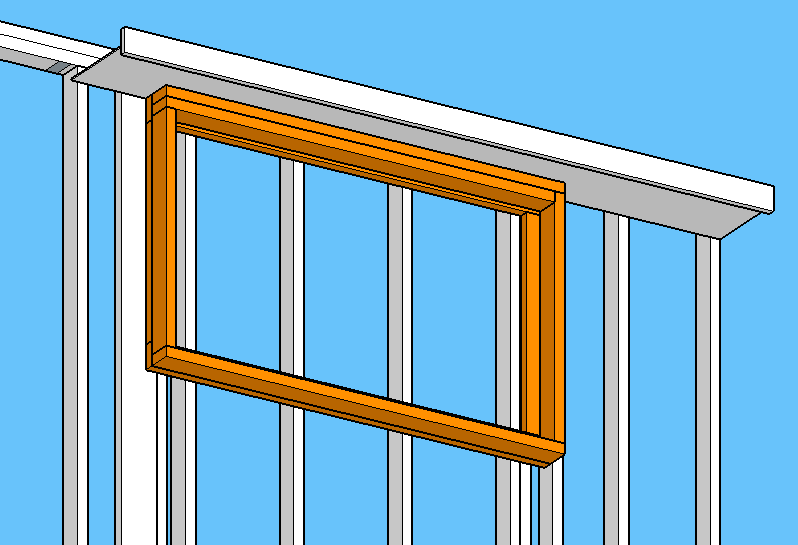
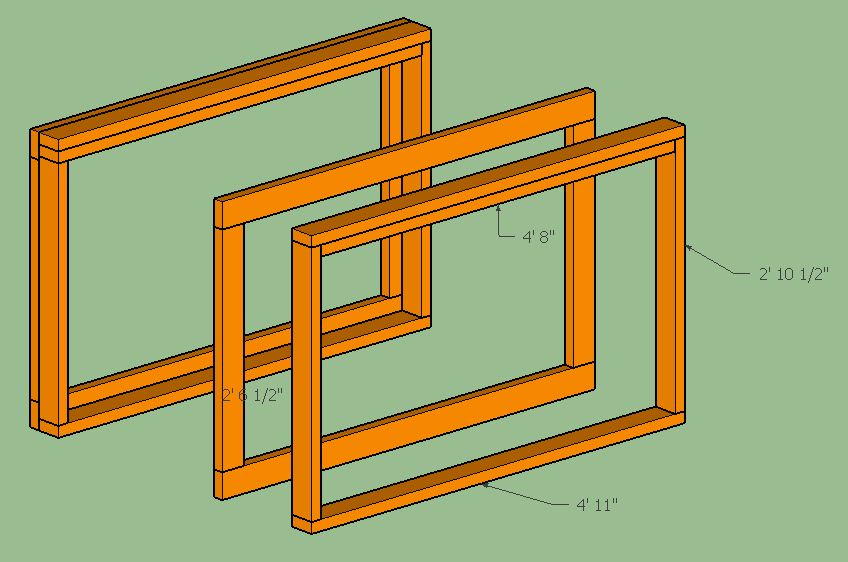
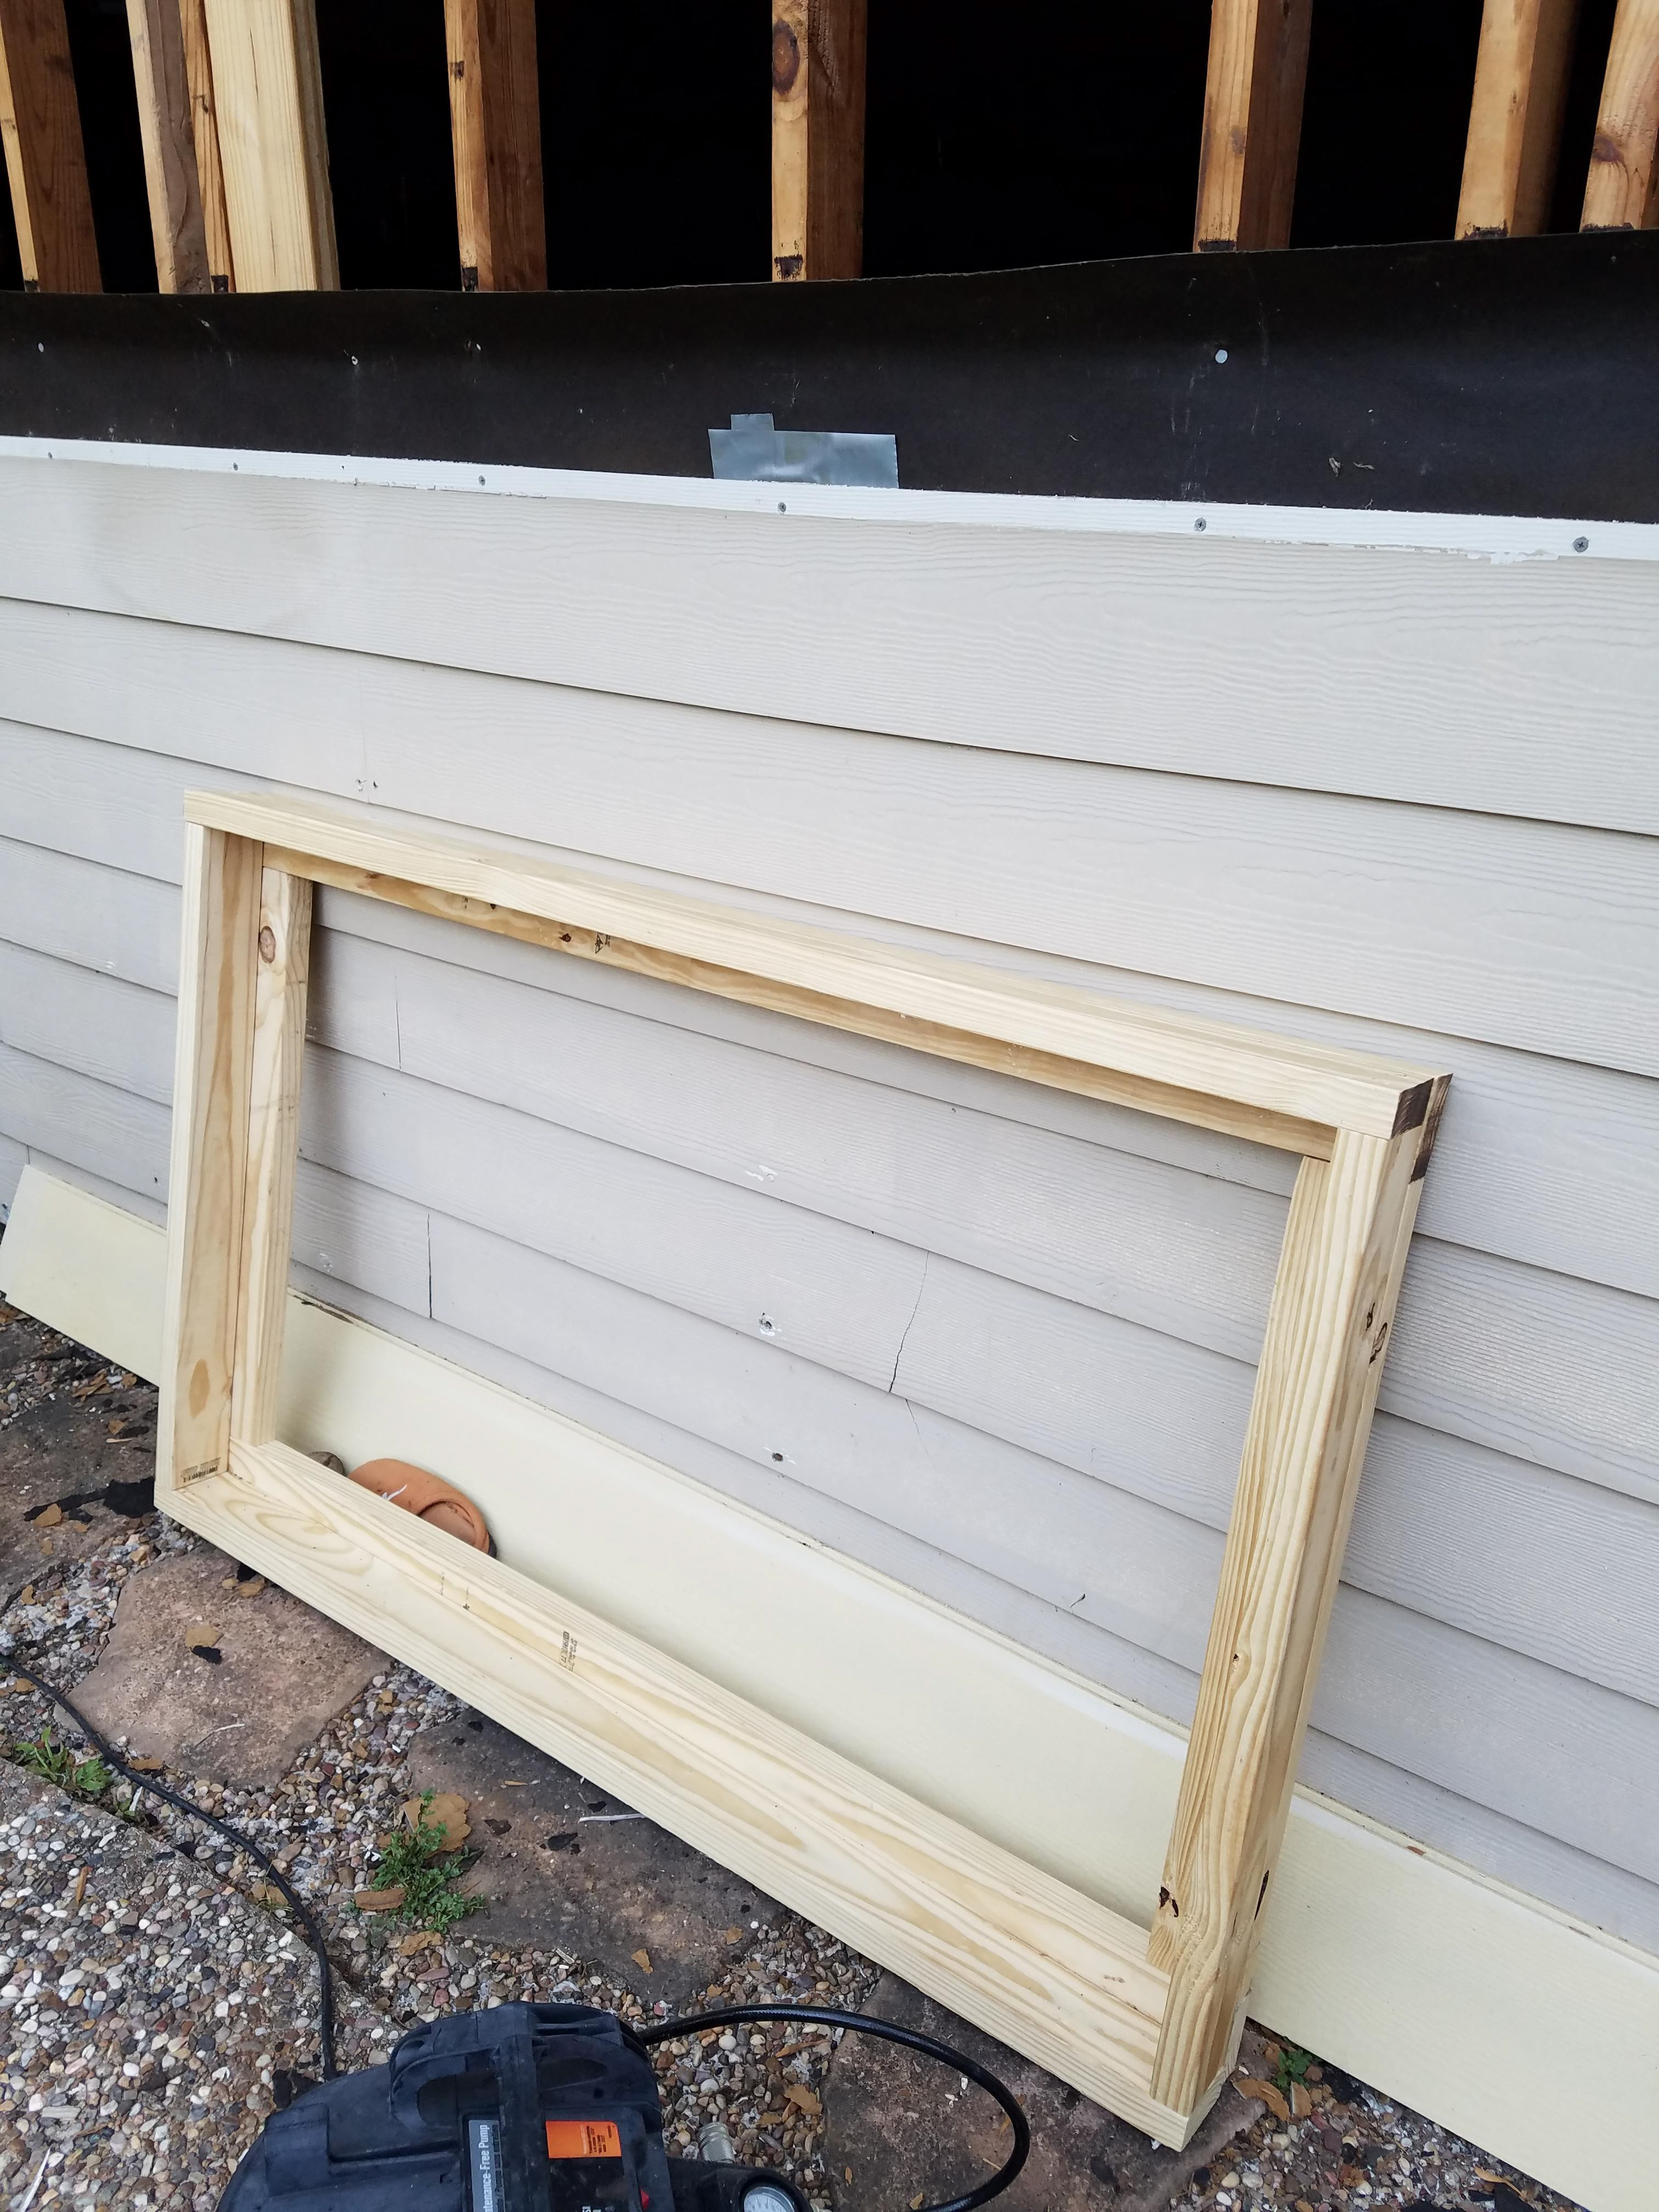
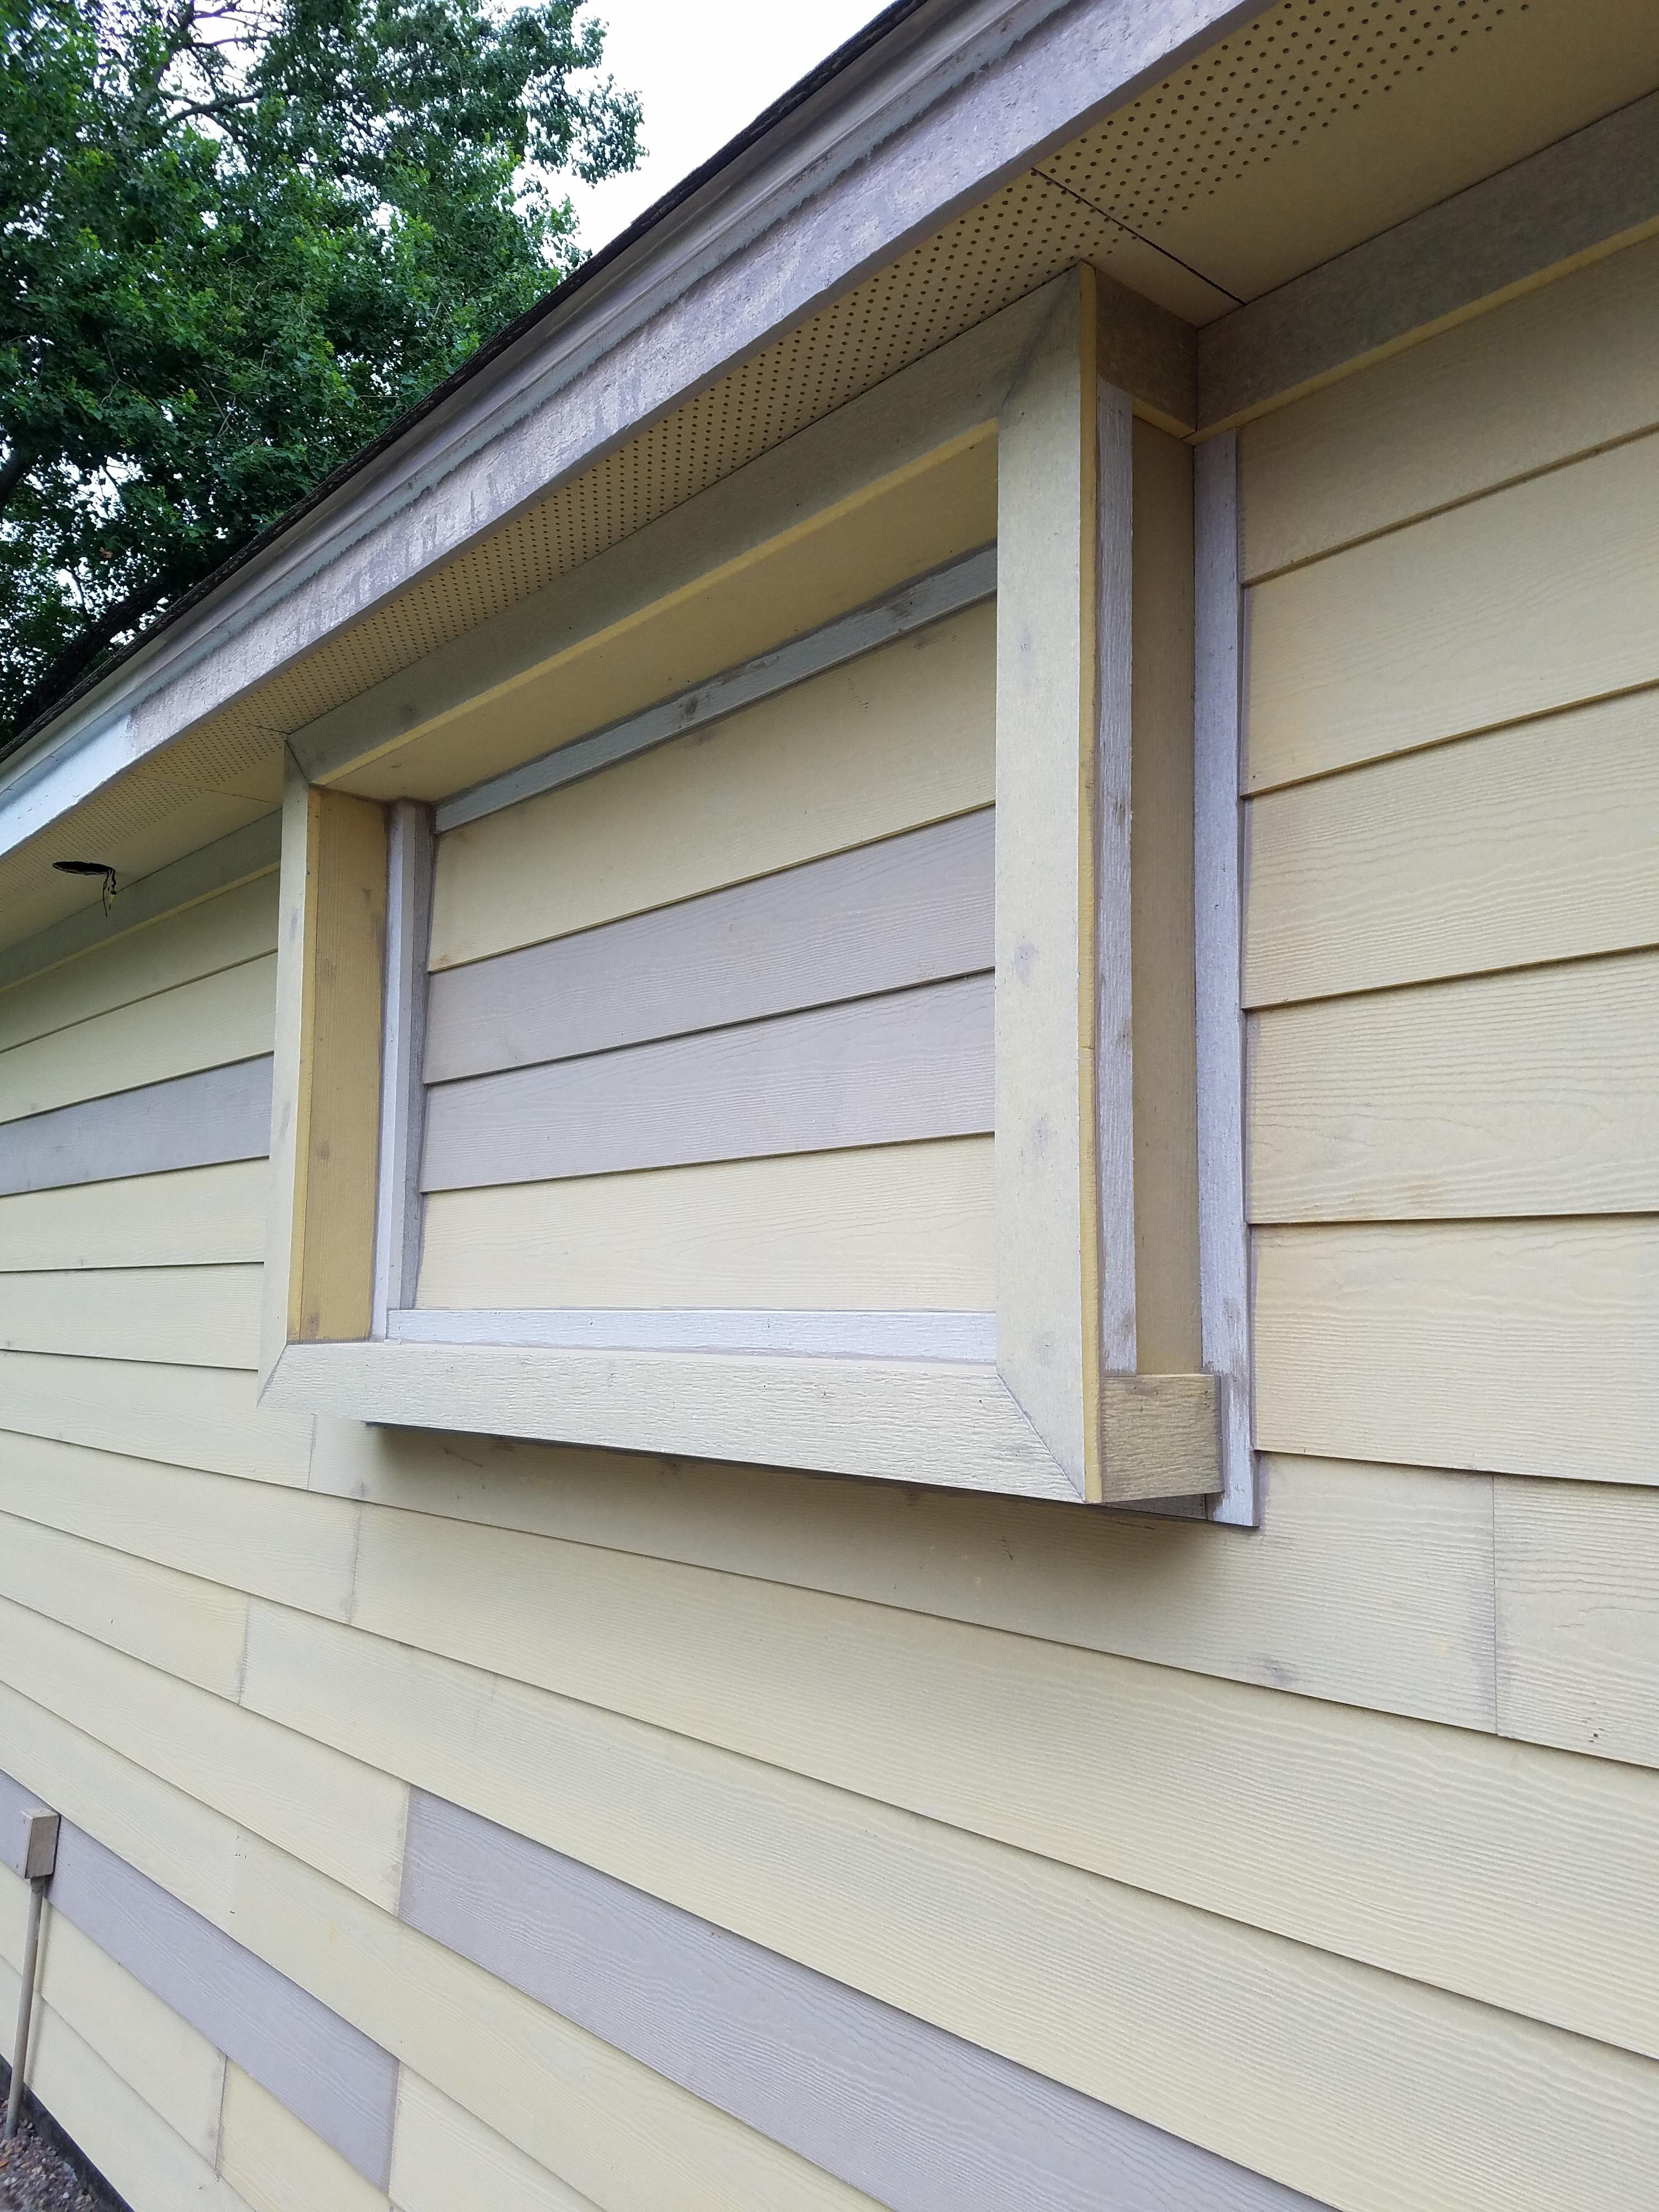
Step 1- Structural Framing
Remove existing siding, trim, and soffit to install reinforcing wall studs and the structural frame for the cabinet as shown in model images below. It is recommended that structural modifications should only be performed by an experienced and licensed contractor. This frame is heavy, requires 2 to install and must be fastened with an adequate number and size of structural screws.
Cabinet framing (excluding existing wall reinforcement and screws) materials for step 1:
2 - 2x4x 2'6.5"
4 - 2x4x 4'11"
1 - 2x4x 4'8"
2 - 2x4x 2'10.5"
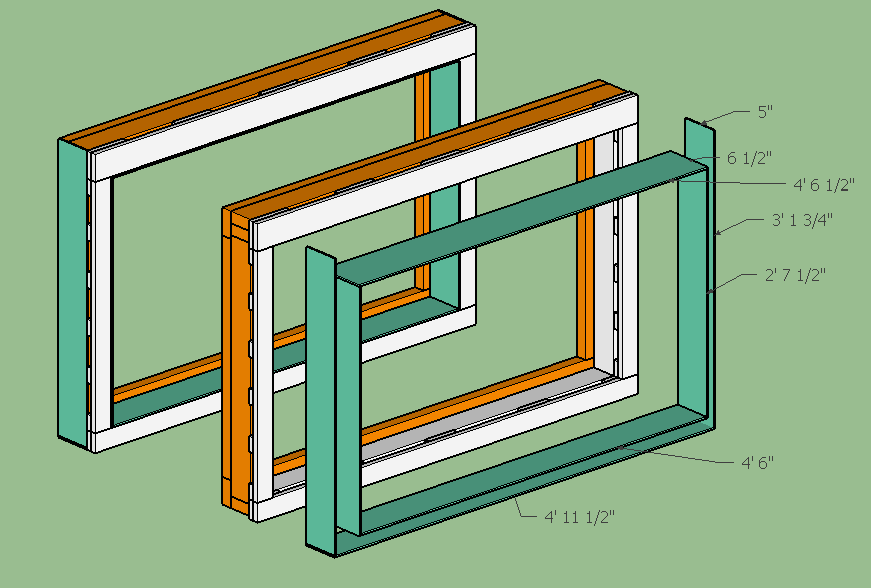
Step 2- Trim Backing
Build the backing to support the finishing Hardie trim and fill the space between trim and structural framing.
Backing framing materials for step 2:
1 - 1x4 x 4' 6.5"
1 - 1x4 x 4'11.5"
2 - 1x4 x 2' 8.5"
1 - 1x4 x 2.5' cut into 6x5" pieces
1 - 1x3 x 2.5' cut into 6x5" pieces
1 - 1x3 x 4'11.5"
2 - 1x3 x 2'7.75"
2 - 1x3 x 1.5' cut into 6x3" pieces

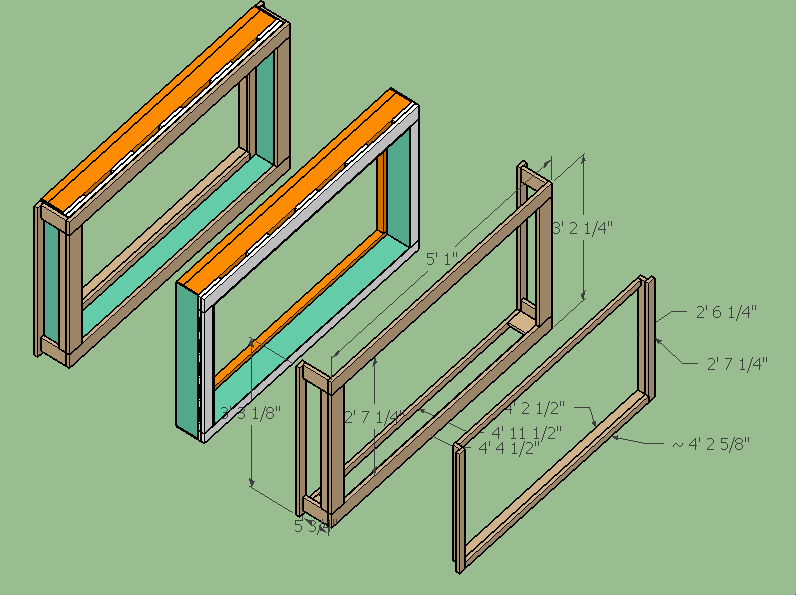
Step 3 - Wrap Frame in Hardie Board
Cover the wood structural frame with 1/4" thick hardie board or similar to create weatherproof finish and proper dimension for trim boards.
Materials for step 3:
2 - 5"x3'1.5" Hardie soffit board (1/4" thick)
1 - 5"x4'11.5" Hardie soffit board (1/4" thick)
1 - 6.5"x4'6.25" Hardie soffit board (1/4" thick)
2 - 5"x2'7.5" Hardie soffit board (1/4" thick)
WARNING: Silica from fiber cement products is extremely hazardous to health. Only cut with specialized tools to prevent dust and use all precautions to prevent any exposure to dust.
Step 4 - Exterior and Interior Trim
Cut and install finish trim to cover all joints and framing, no rips should be required.
Materials for step 4:
External trim
2 - 1x4x 5'1" Hardie Trim
2 - 1x4x 3'2.25" Hardie Trim
2 - 1x2x 2'7.25" Hardie Trim
2 - 1x2x 3'3.125" Hardie Trim
1 - 1x2x 4'4.5" Hardie Trim
6 - 1x4x 5.75" Hardie Trim
Internal trim
2 - 1x2x 4'2.5" Hardie Trim
2 - 1x2x 2'6.25" Hardie Trim
2 - 1x2x 2'7.25" Hardie Trim
1 - 1x2x 4'2.625" Hardie Trim
1 - 1x2x 4'11.5" Hardie Trim
WARNING: Silica from fiber cement products is extremely hazardous to health. Only cut with specialized tools to prevent dust and use all precautions to prevent any exposure to dust
Step 5 - Install Siding, Caulk Joints, and Paint
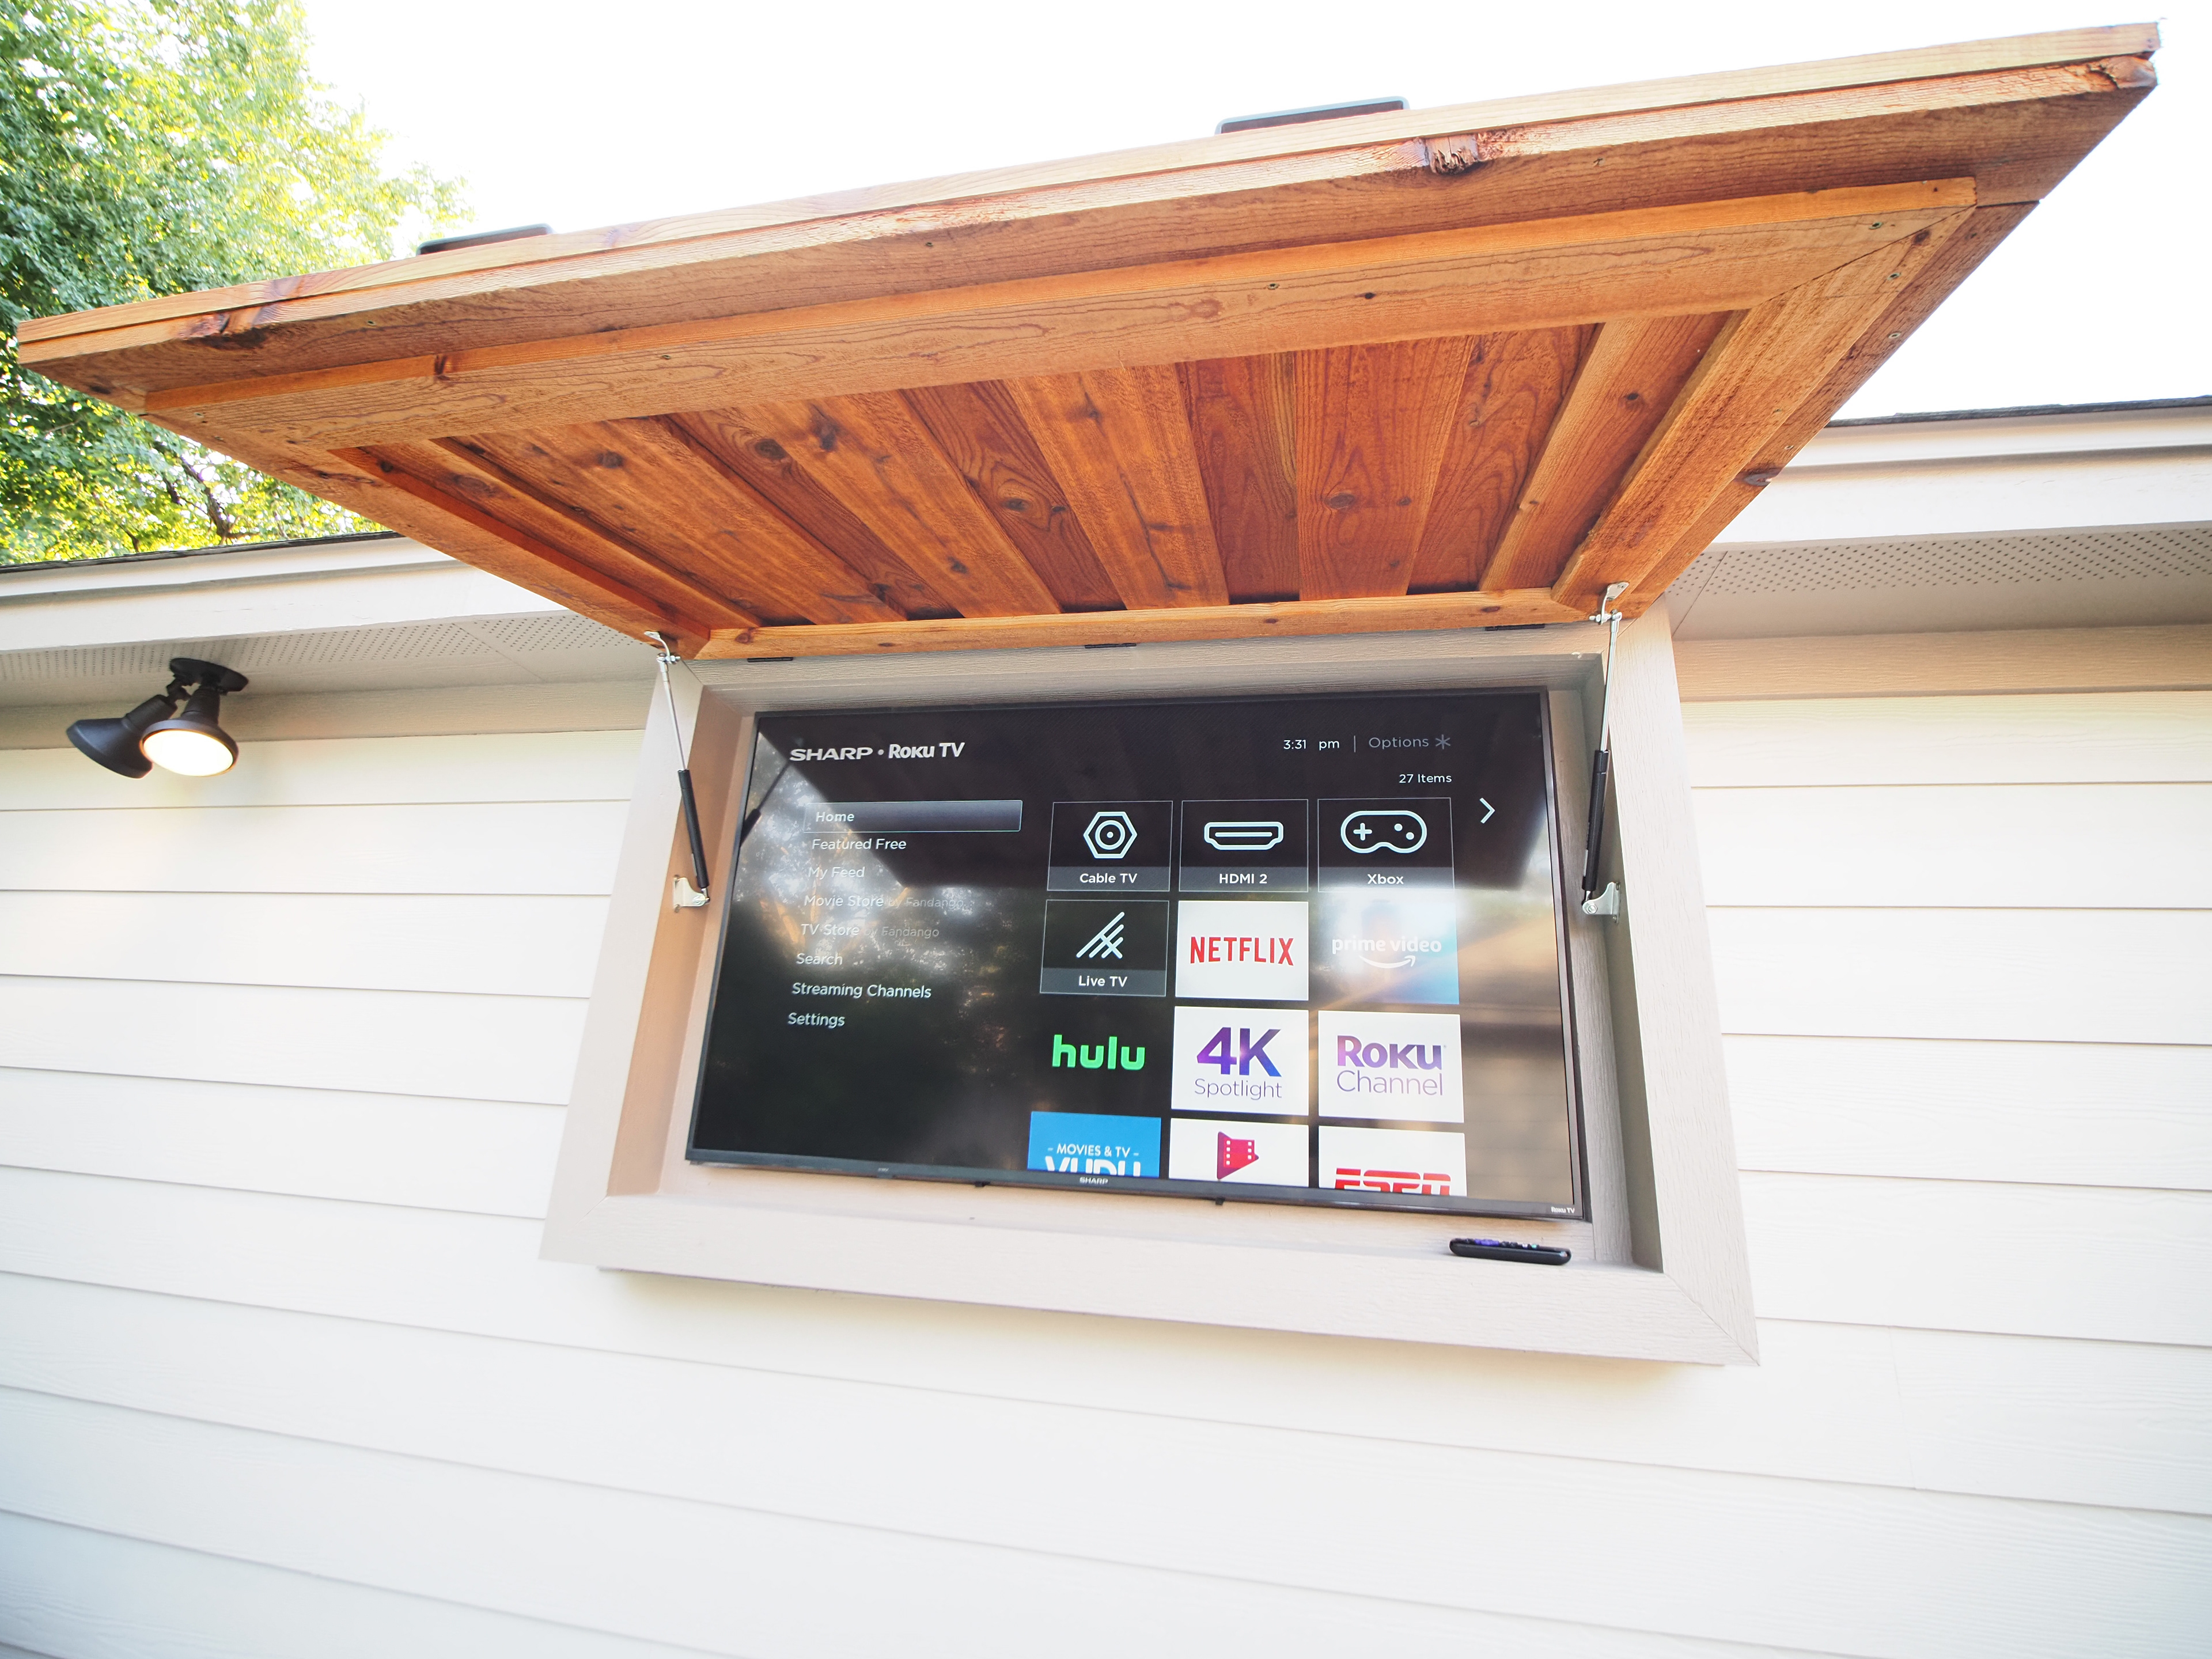
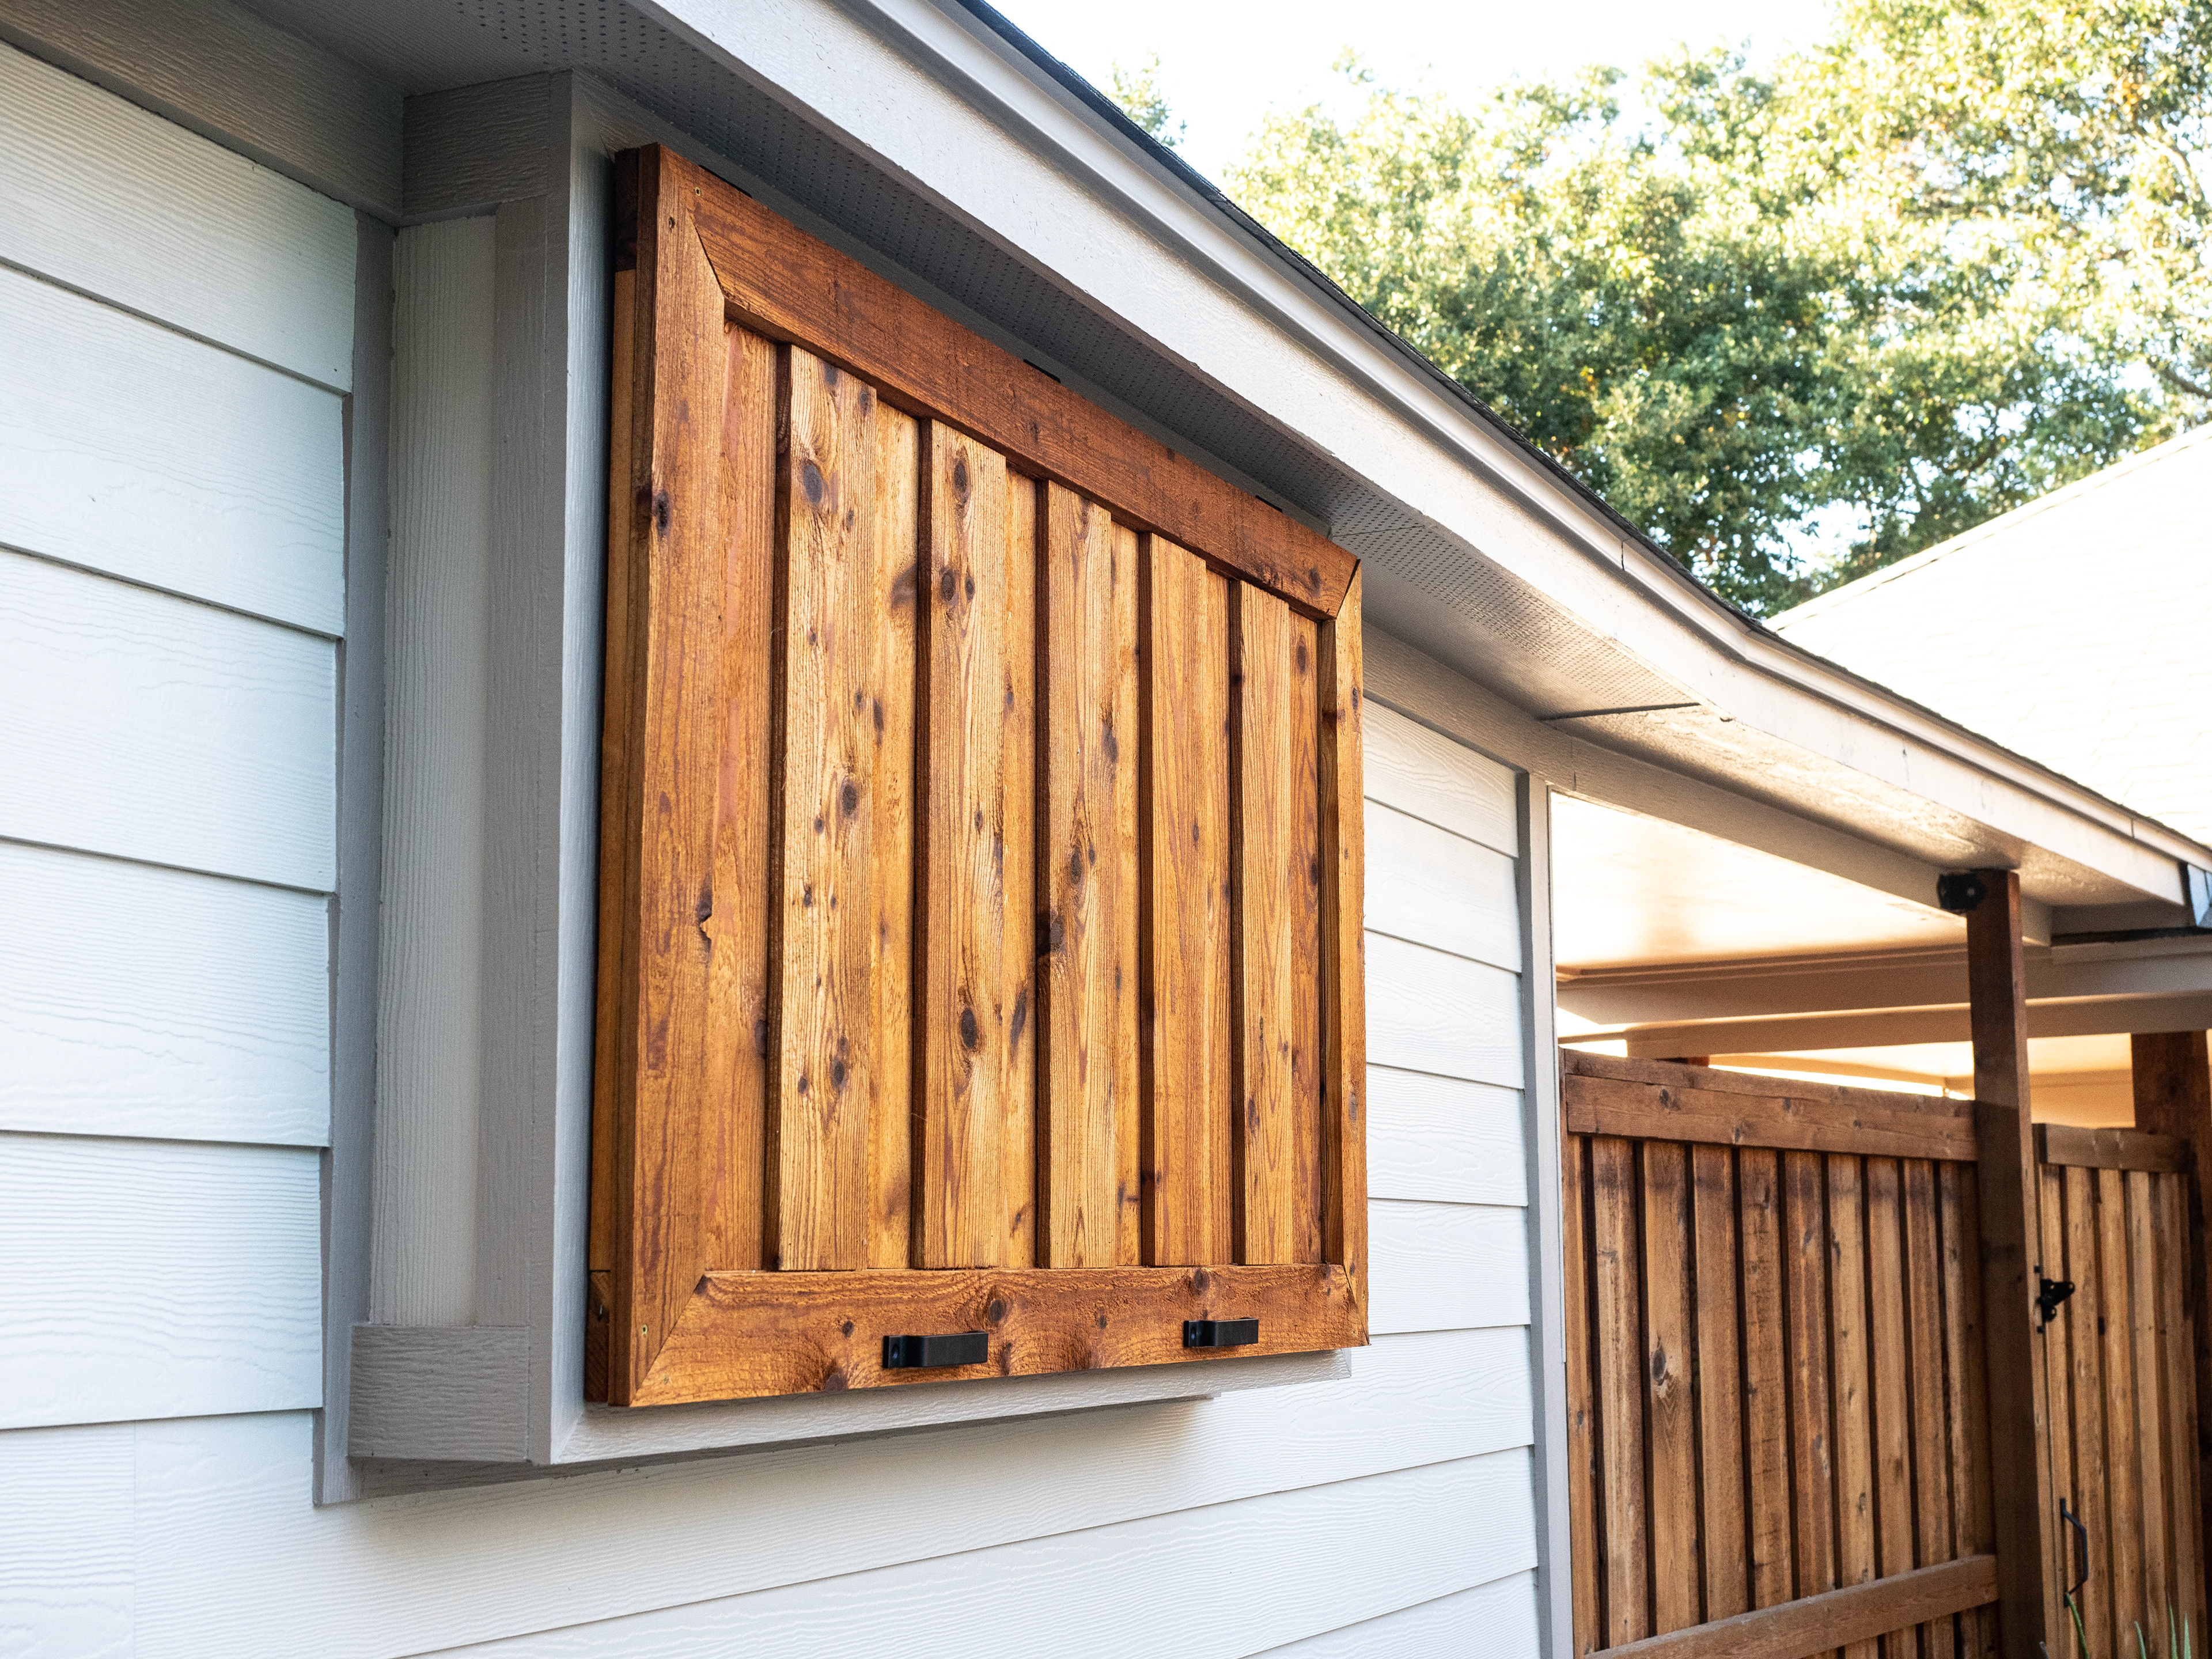
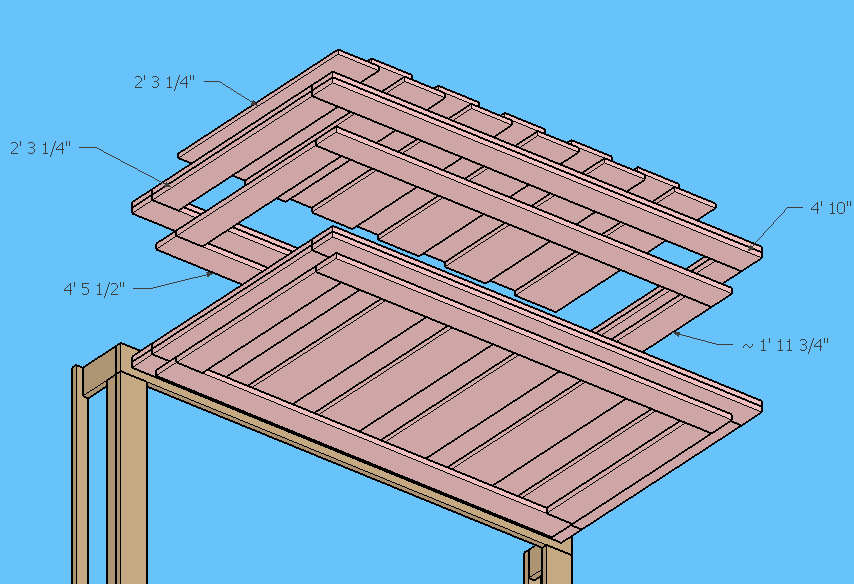
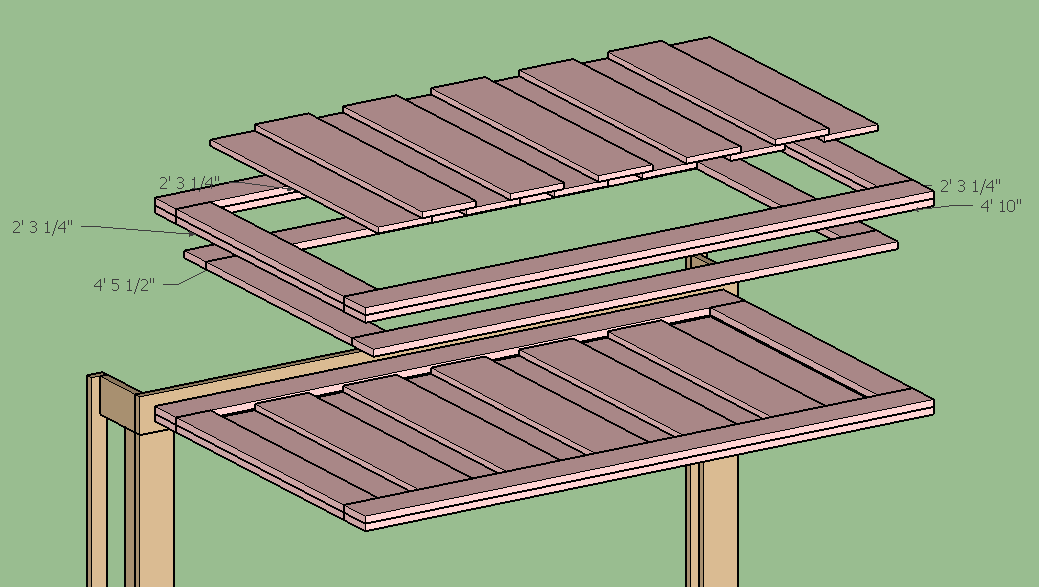
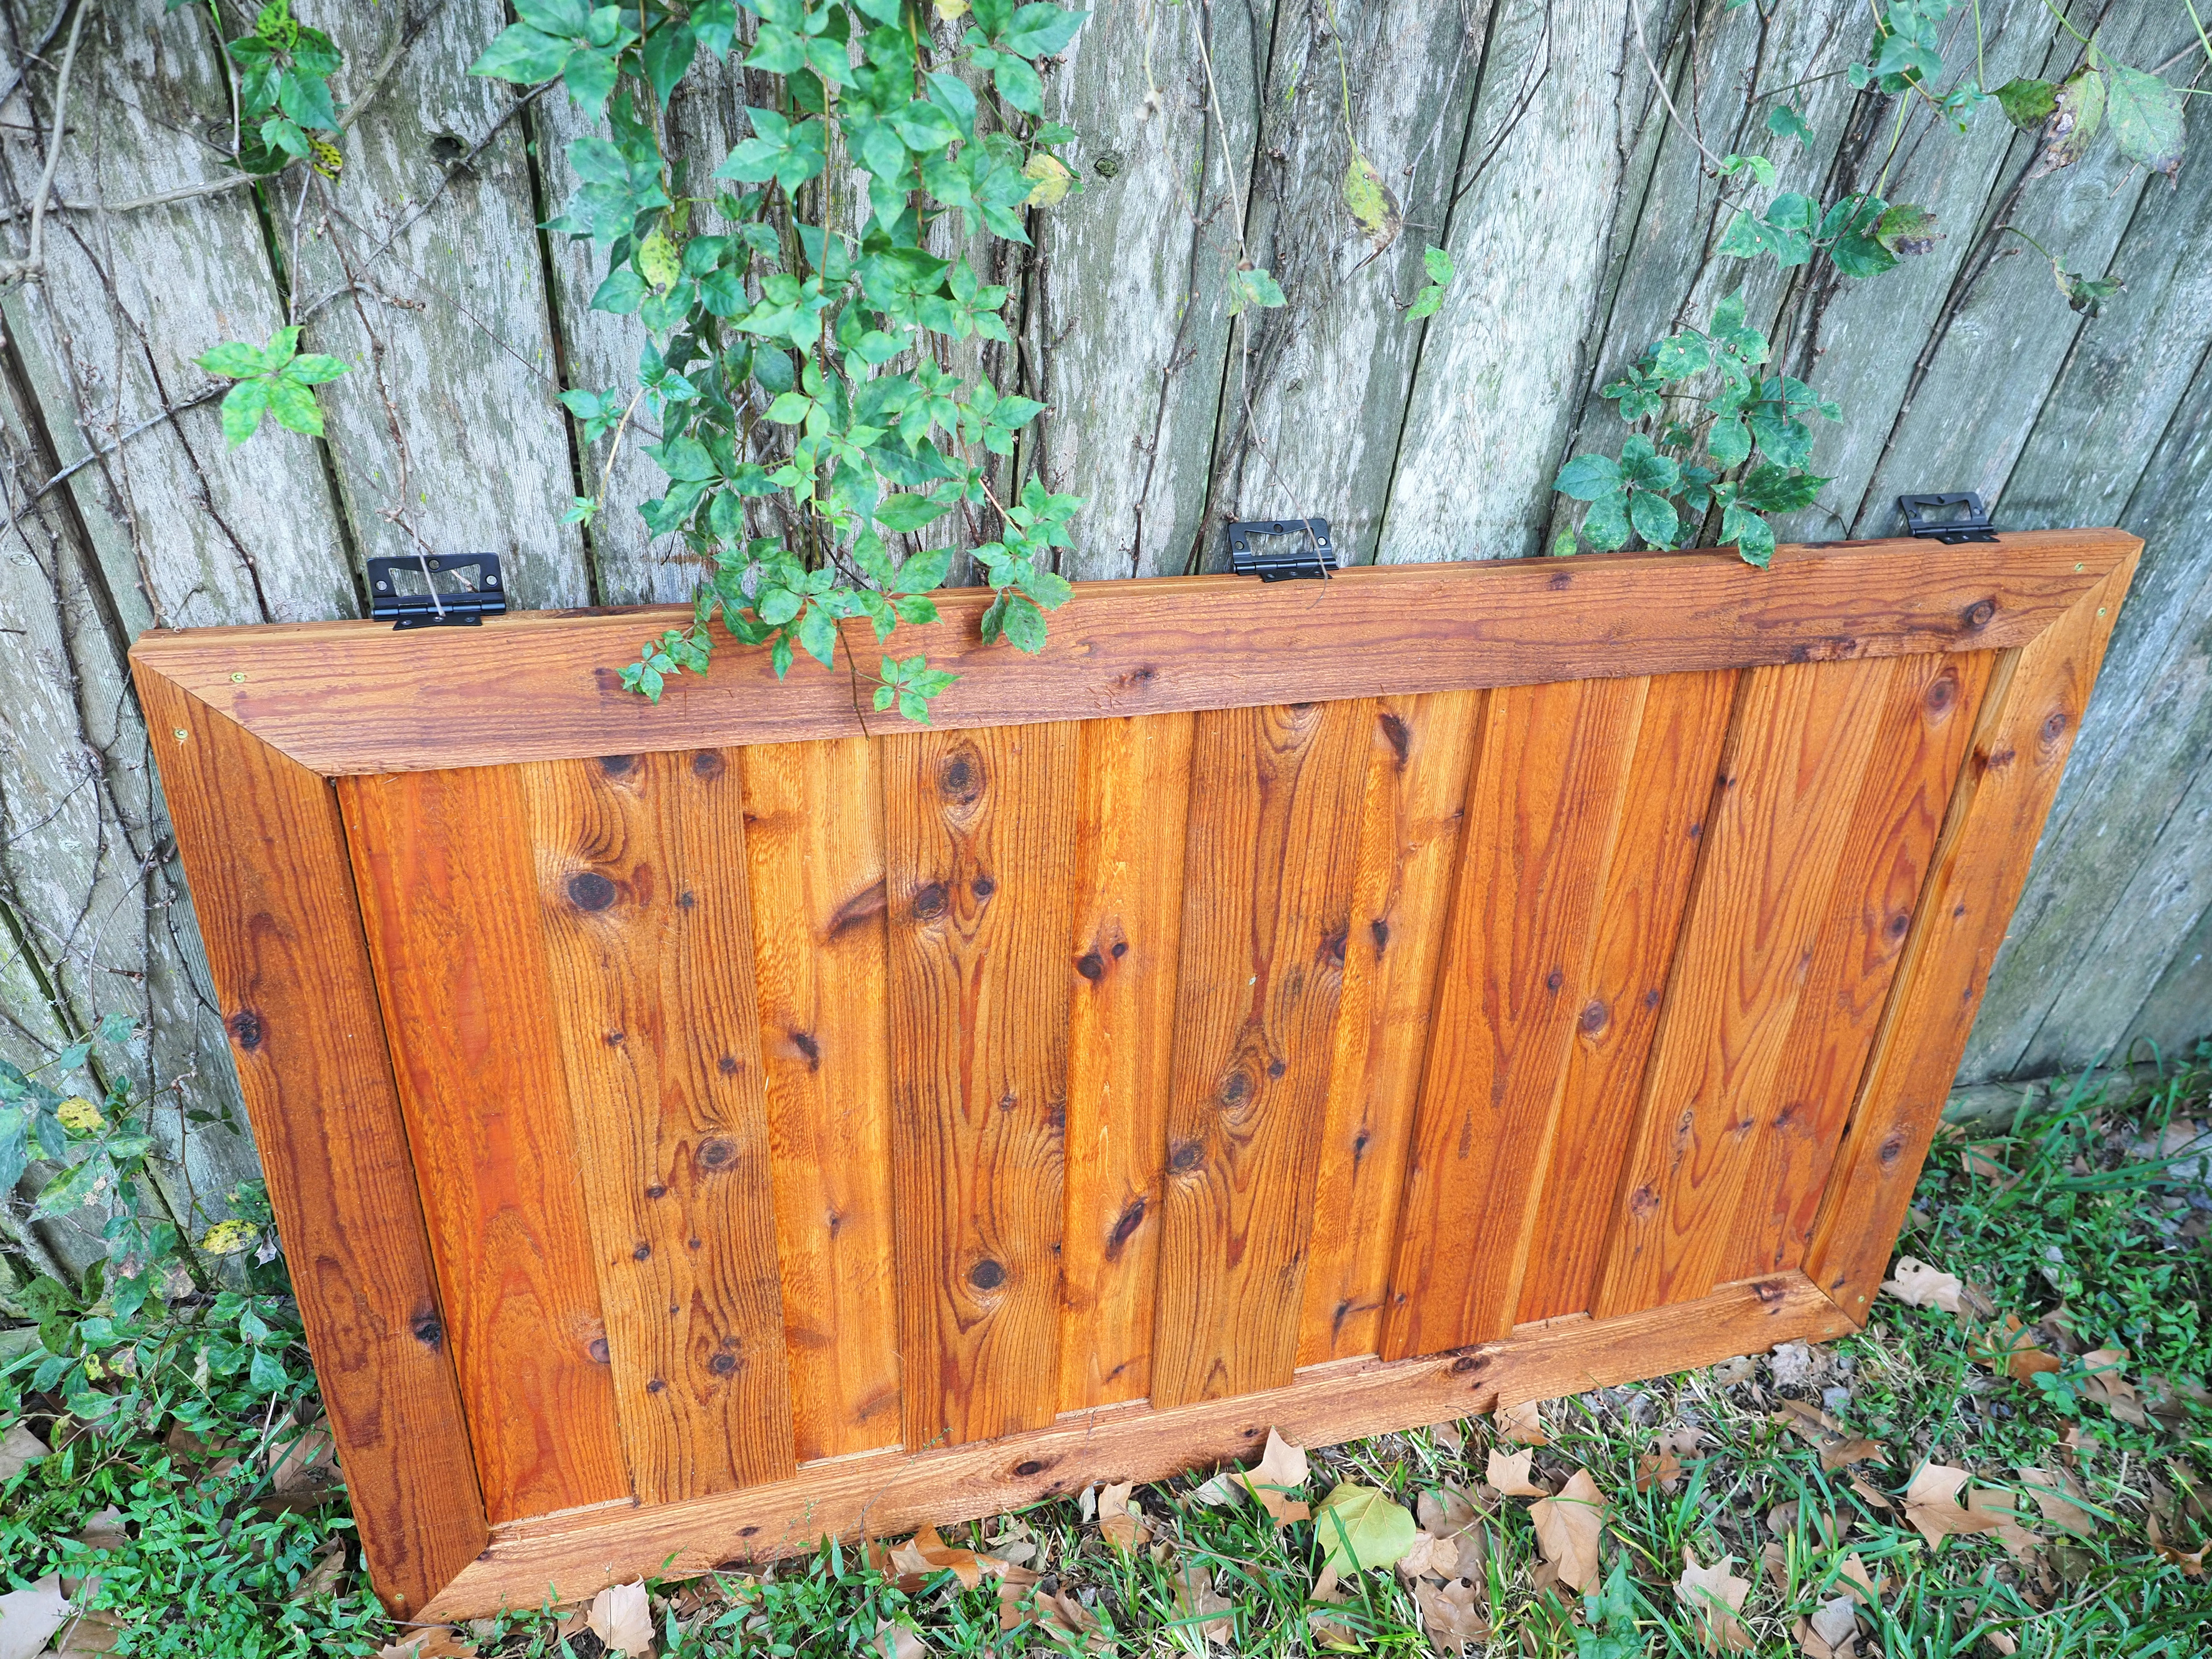
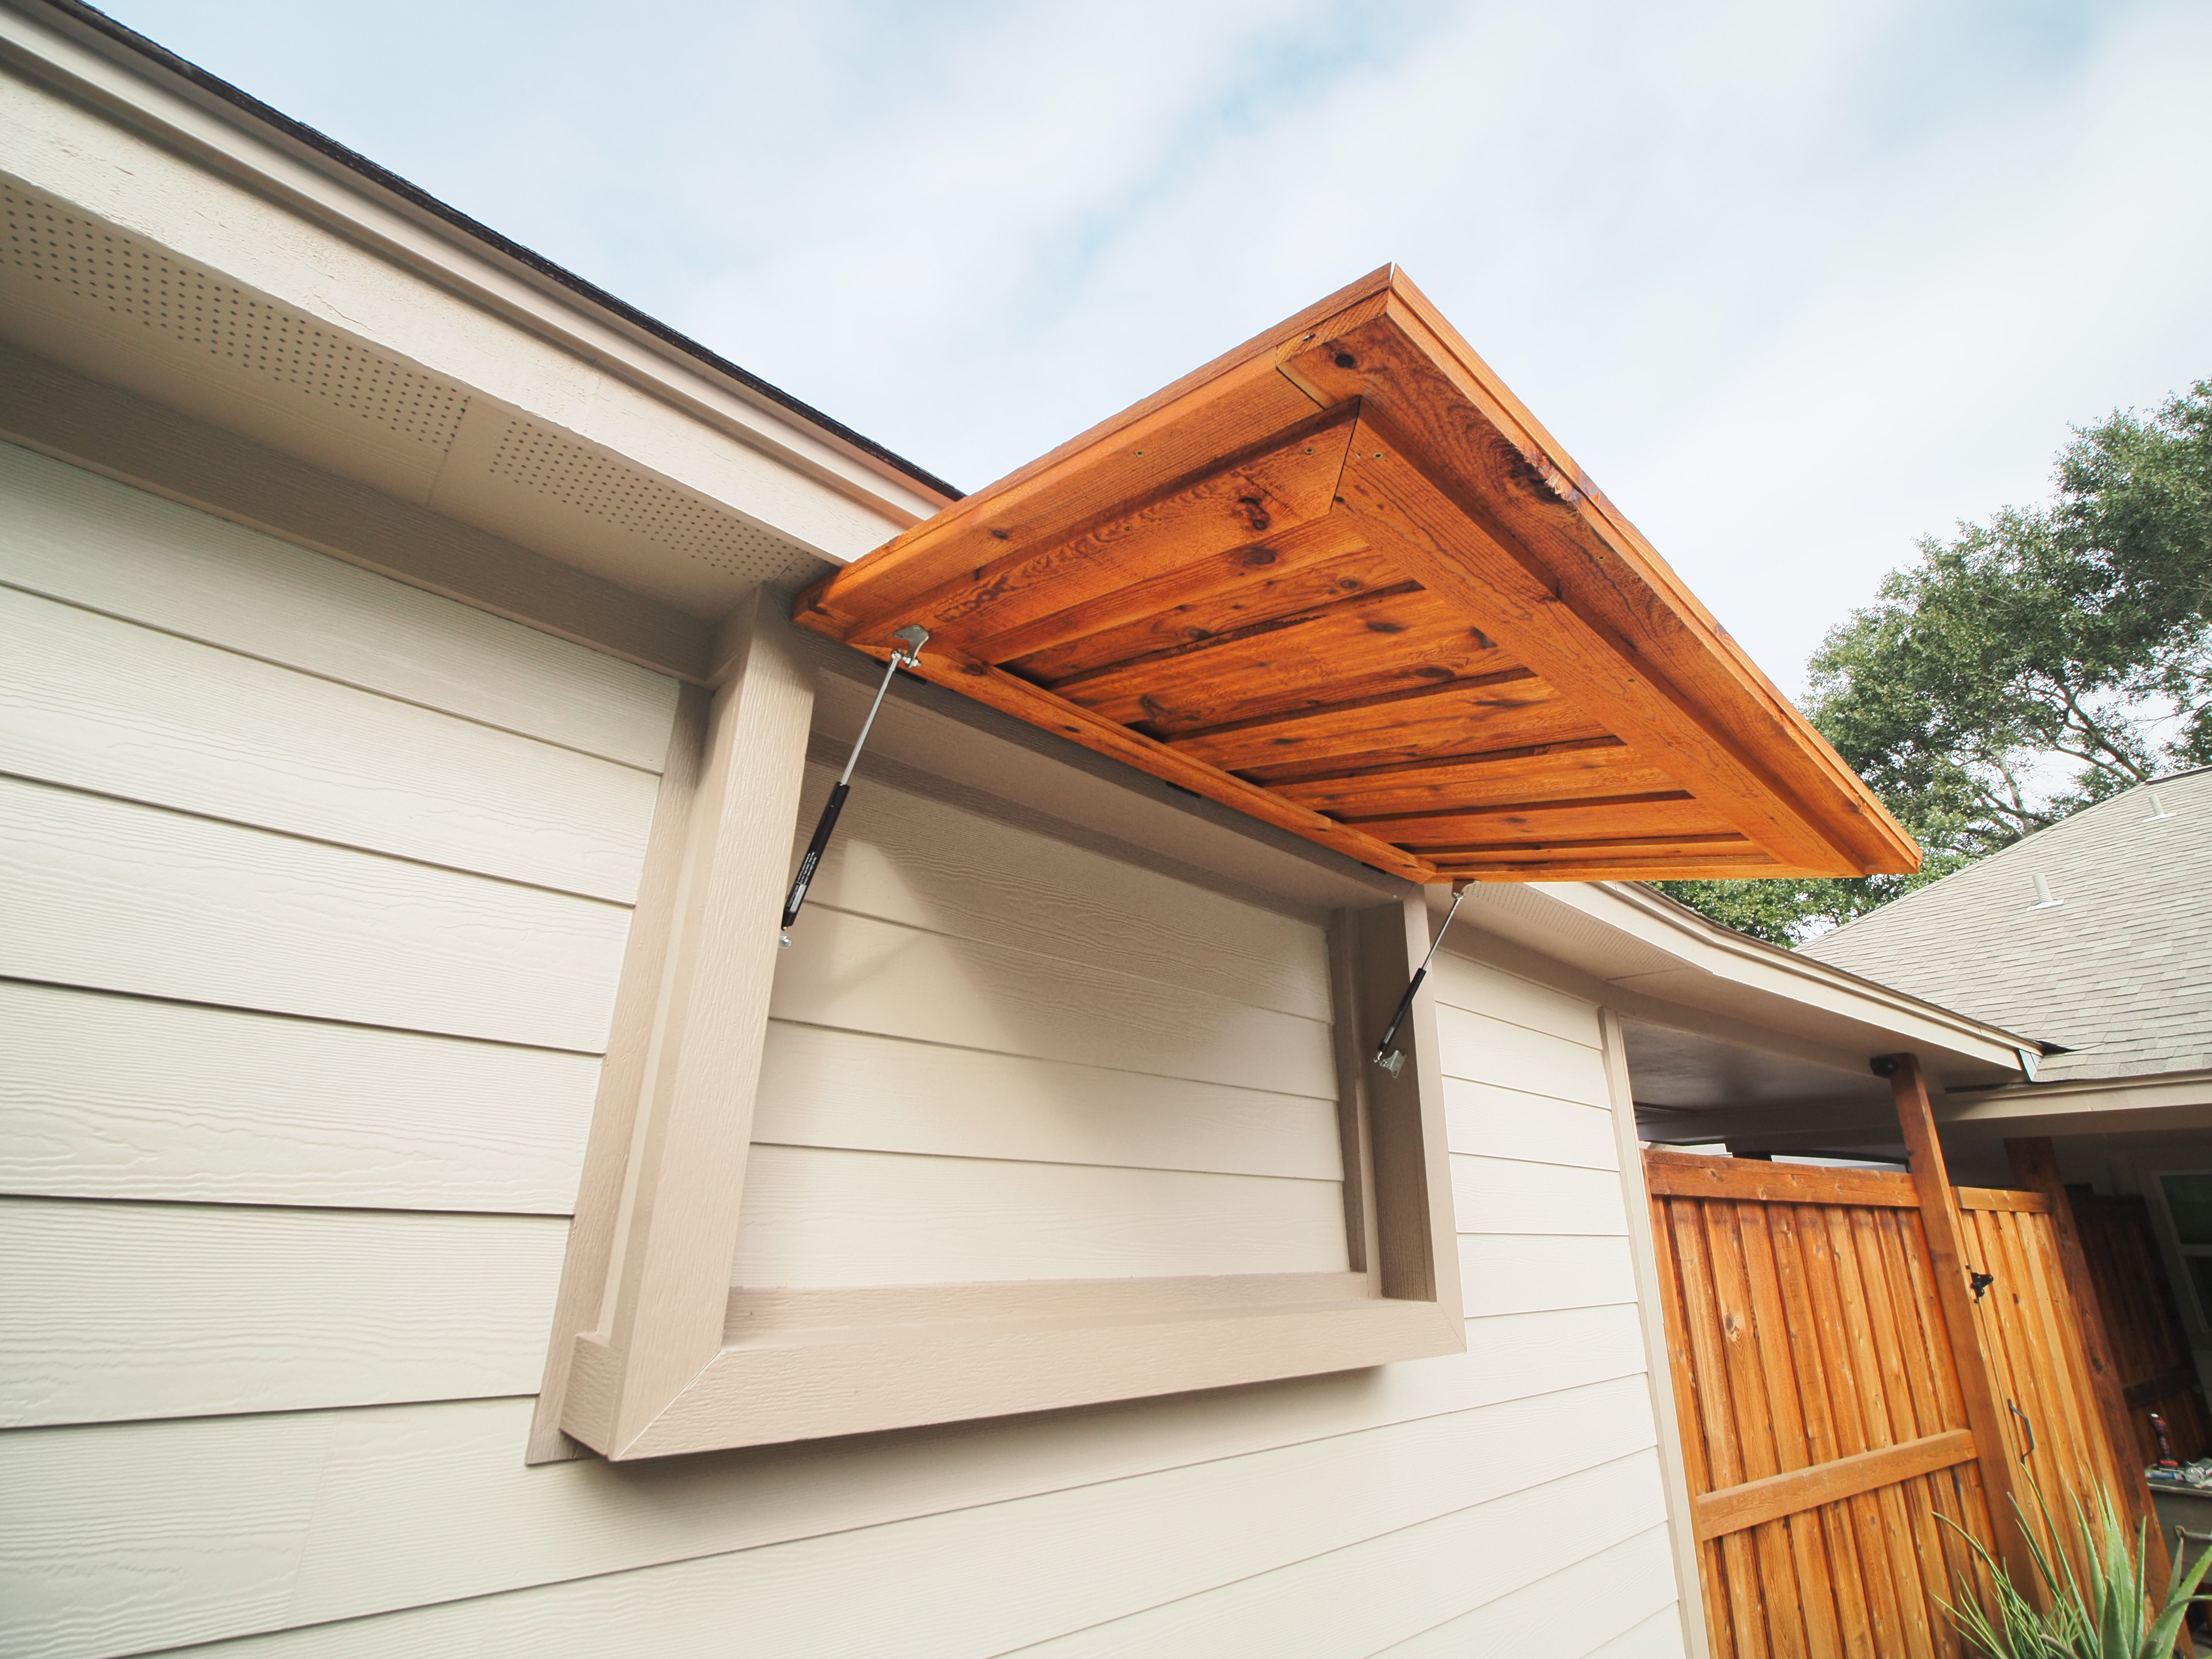
Step 6 - Build Door/Cover
Build door from cedar pickets and trim board, stain or paint. Recommend removing about 1/2" from the total height shown to prevent hitting the fascia when opened. Install at least three hinges
Materials for step 6:
2 - 1x4x 4'5.5" Cedar Trim
2 - 1x4x 1'11.75" Cedar Trim
2 - 1x4x 2'3.25" Cedar Trim
2 - 1x4x 4'10" Cedar Trim
2 - 1x4x 4'10" Cedar Trim Miter Cut
2 - 1x4x 2'6.75" Cedar Trim Miter Cut
11 - 2'3.25" Cedar Picket
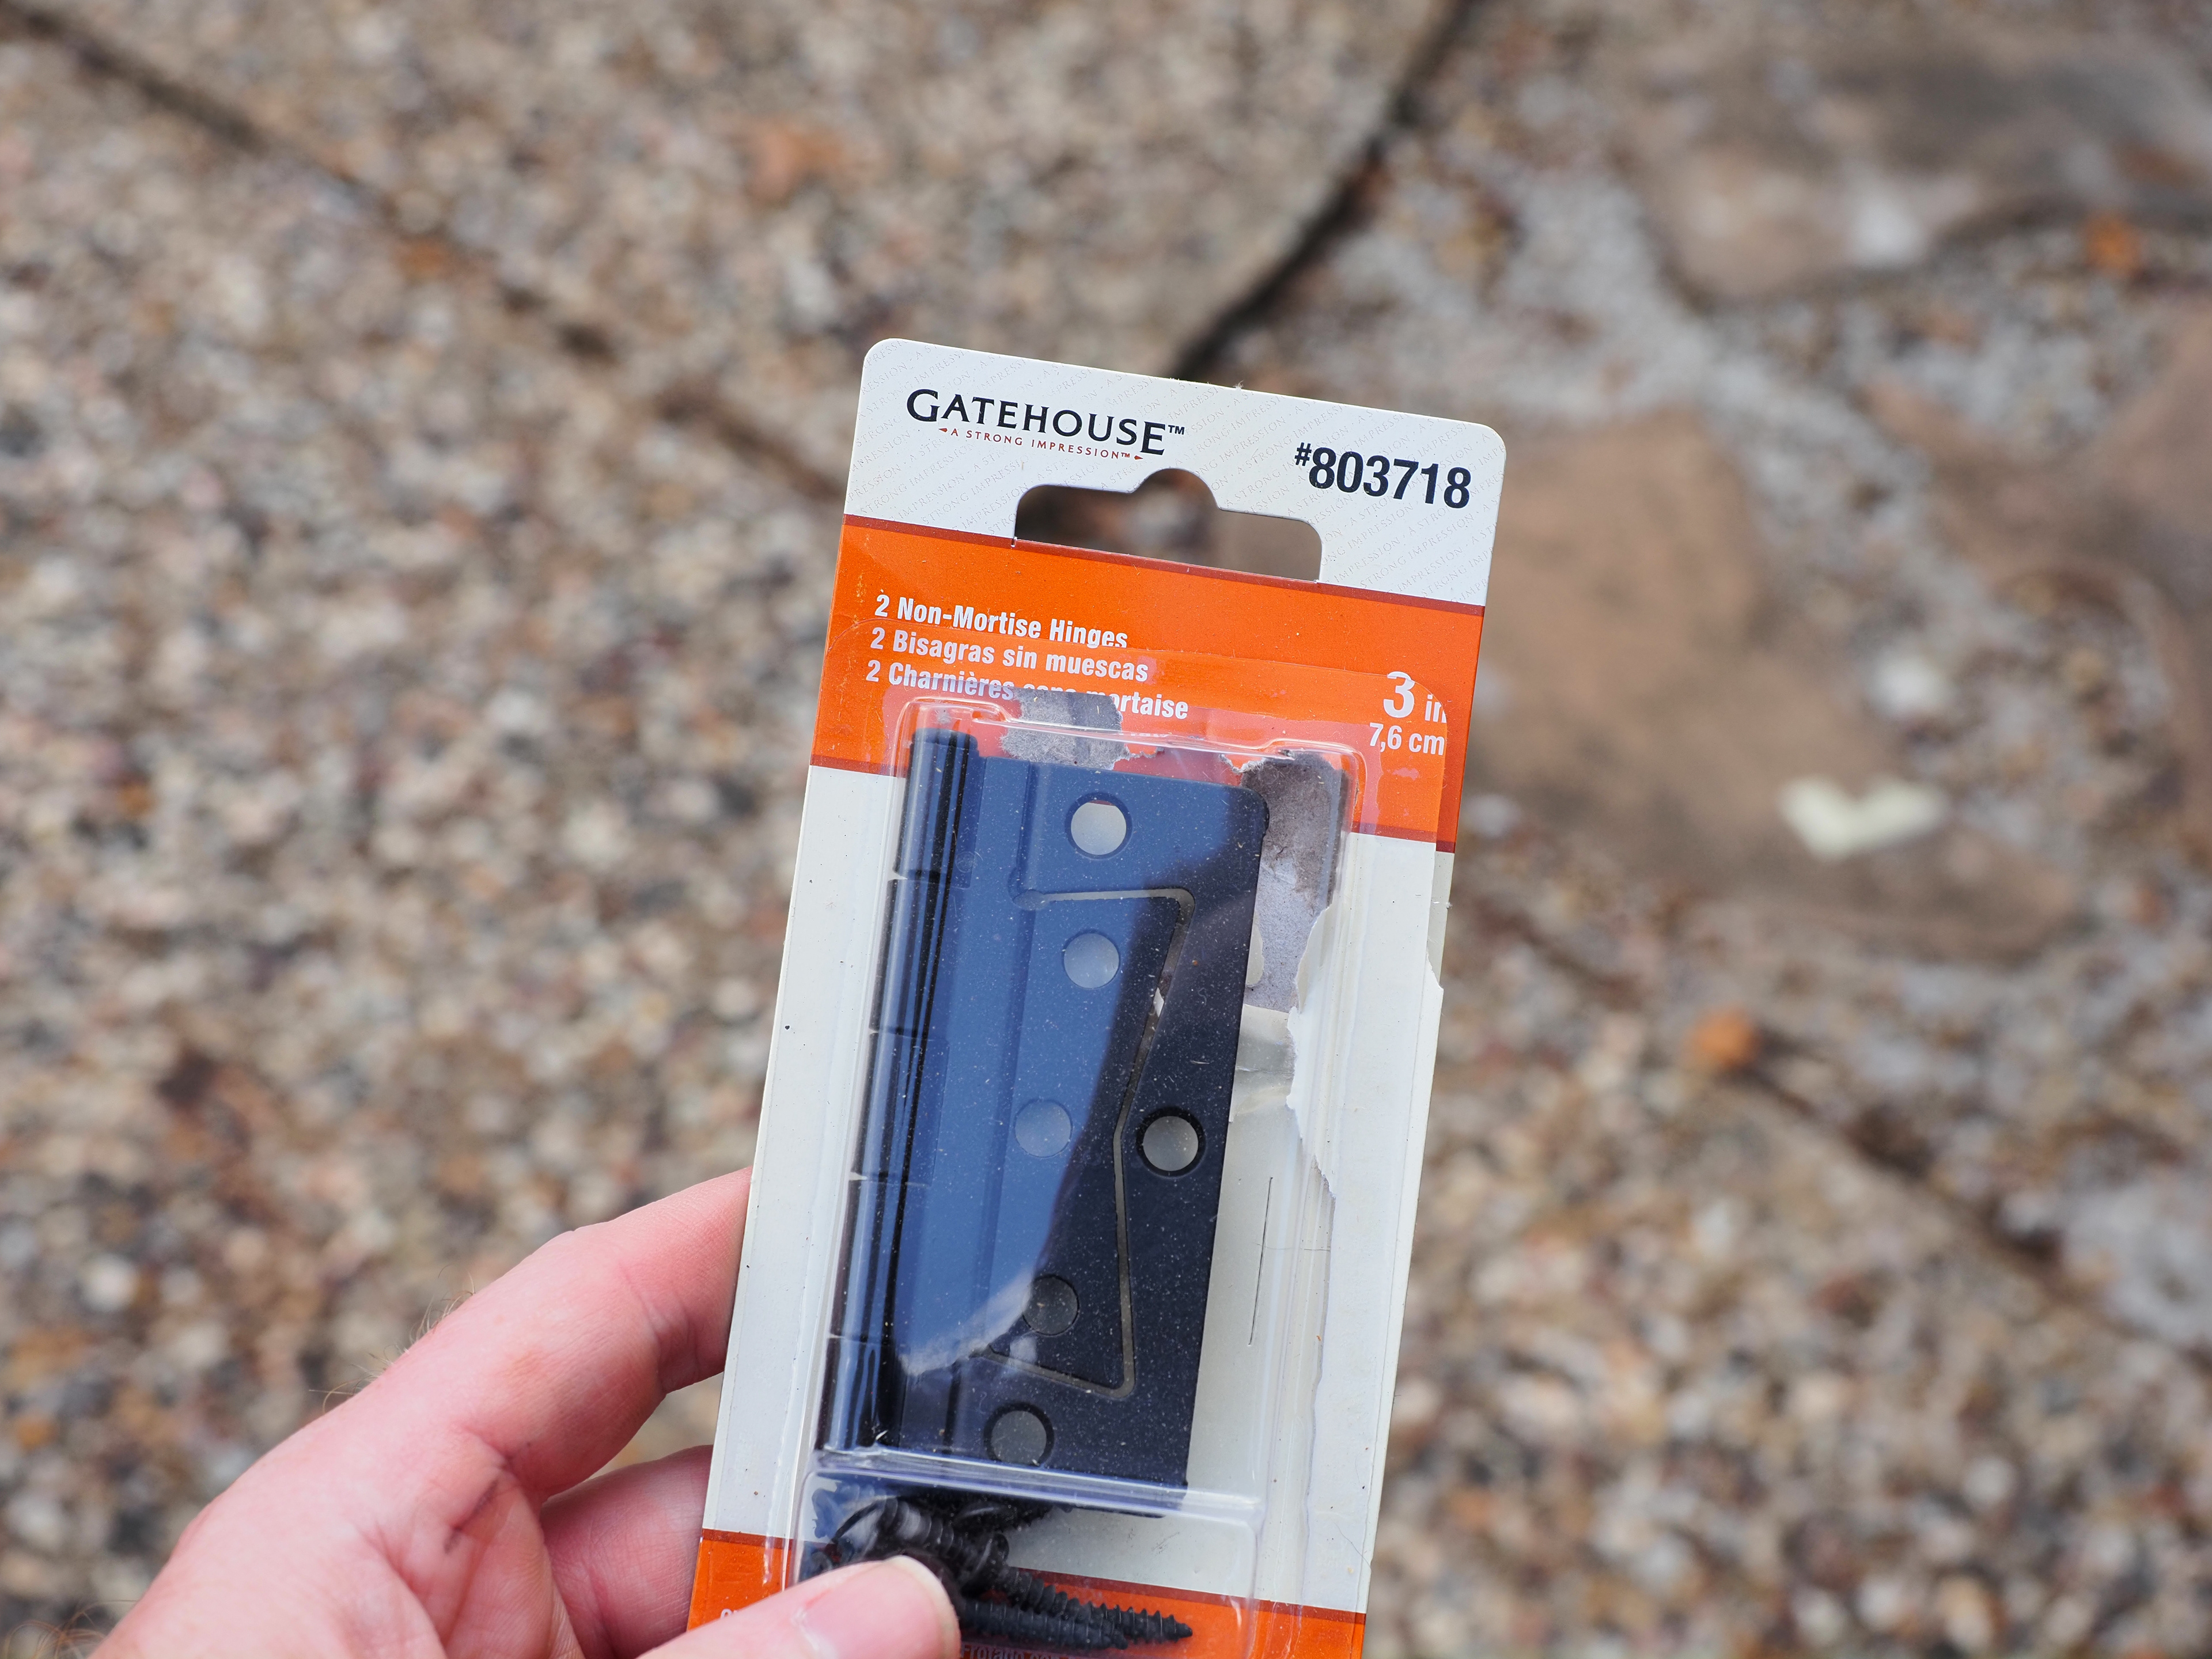
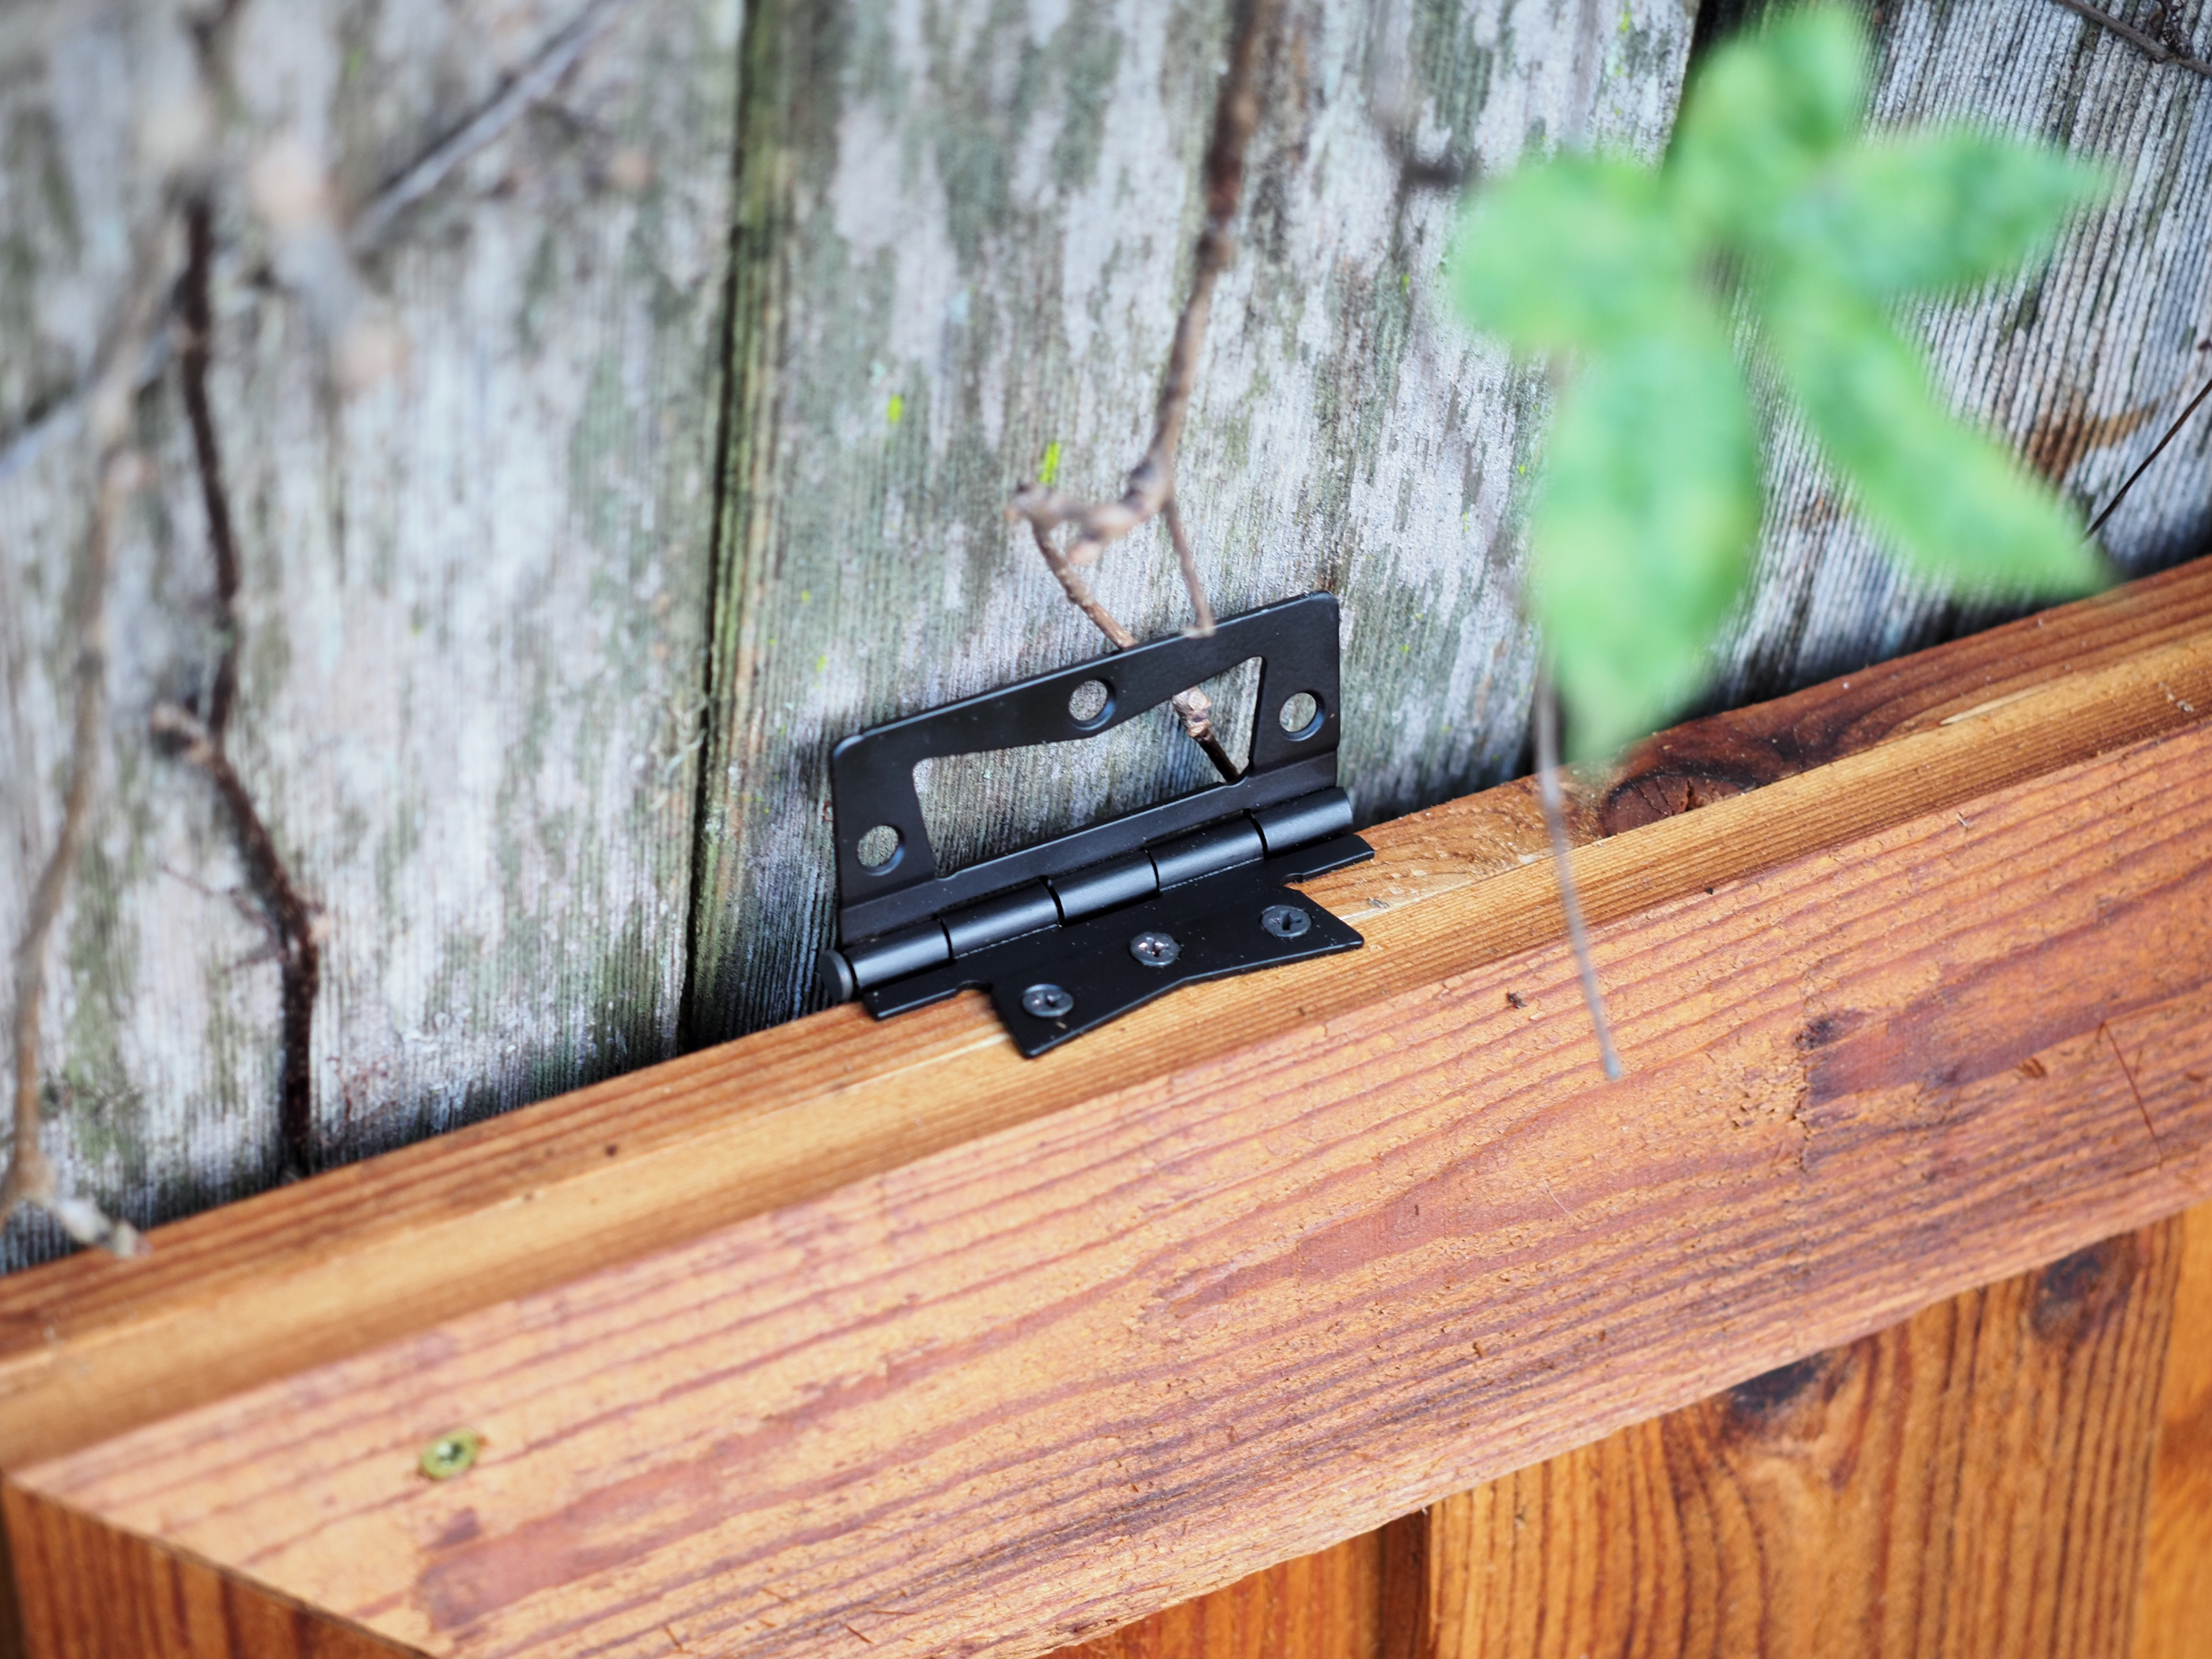
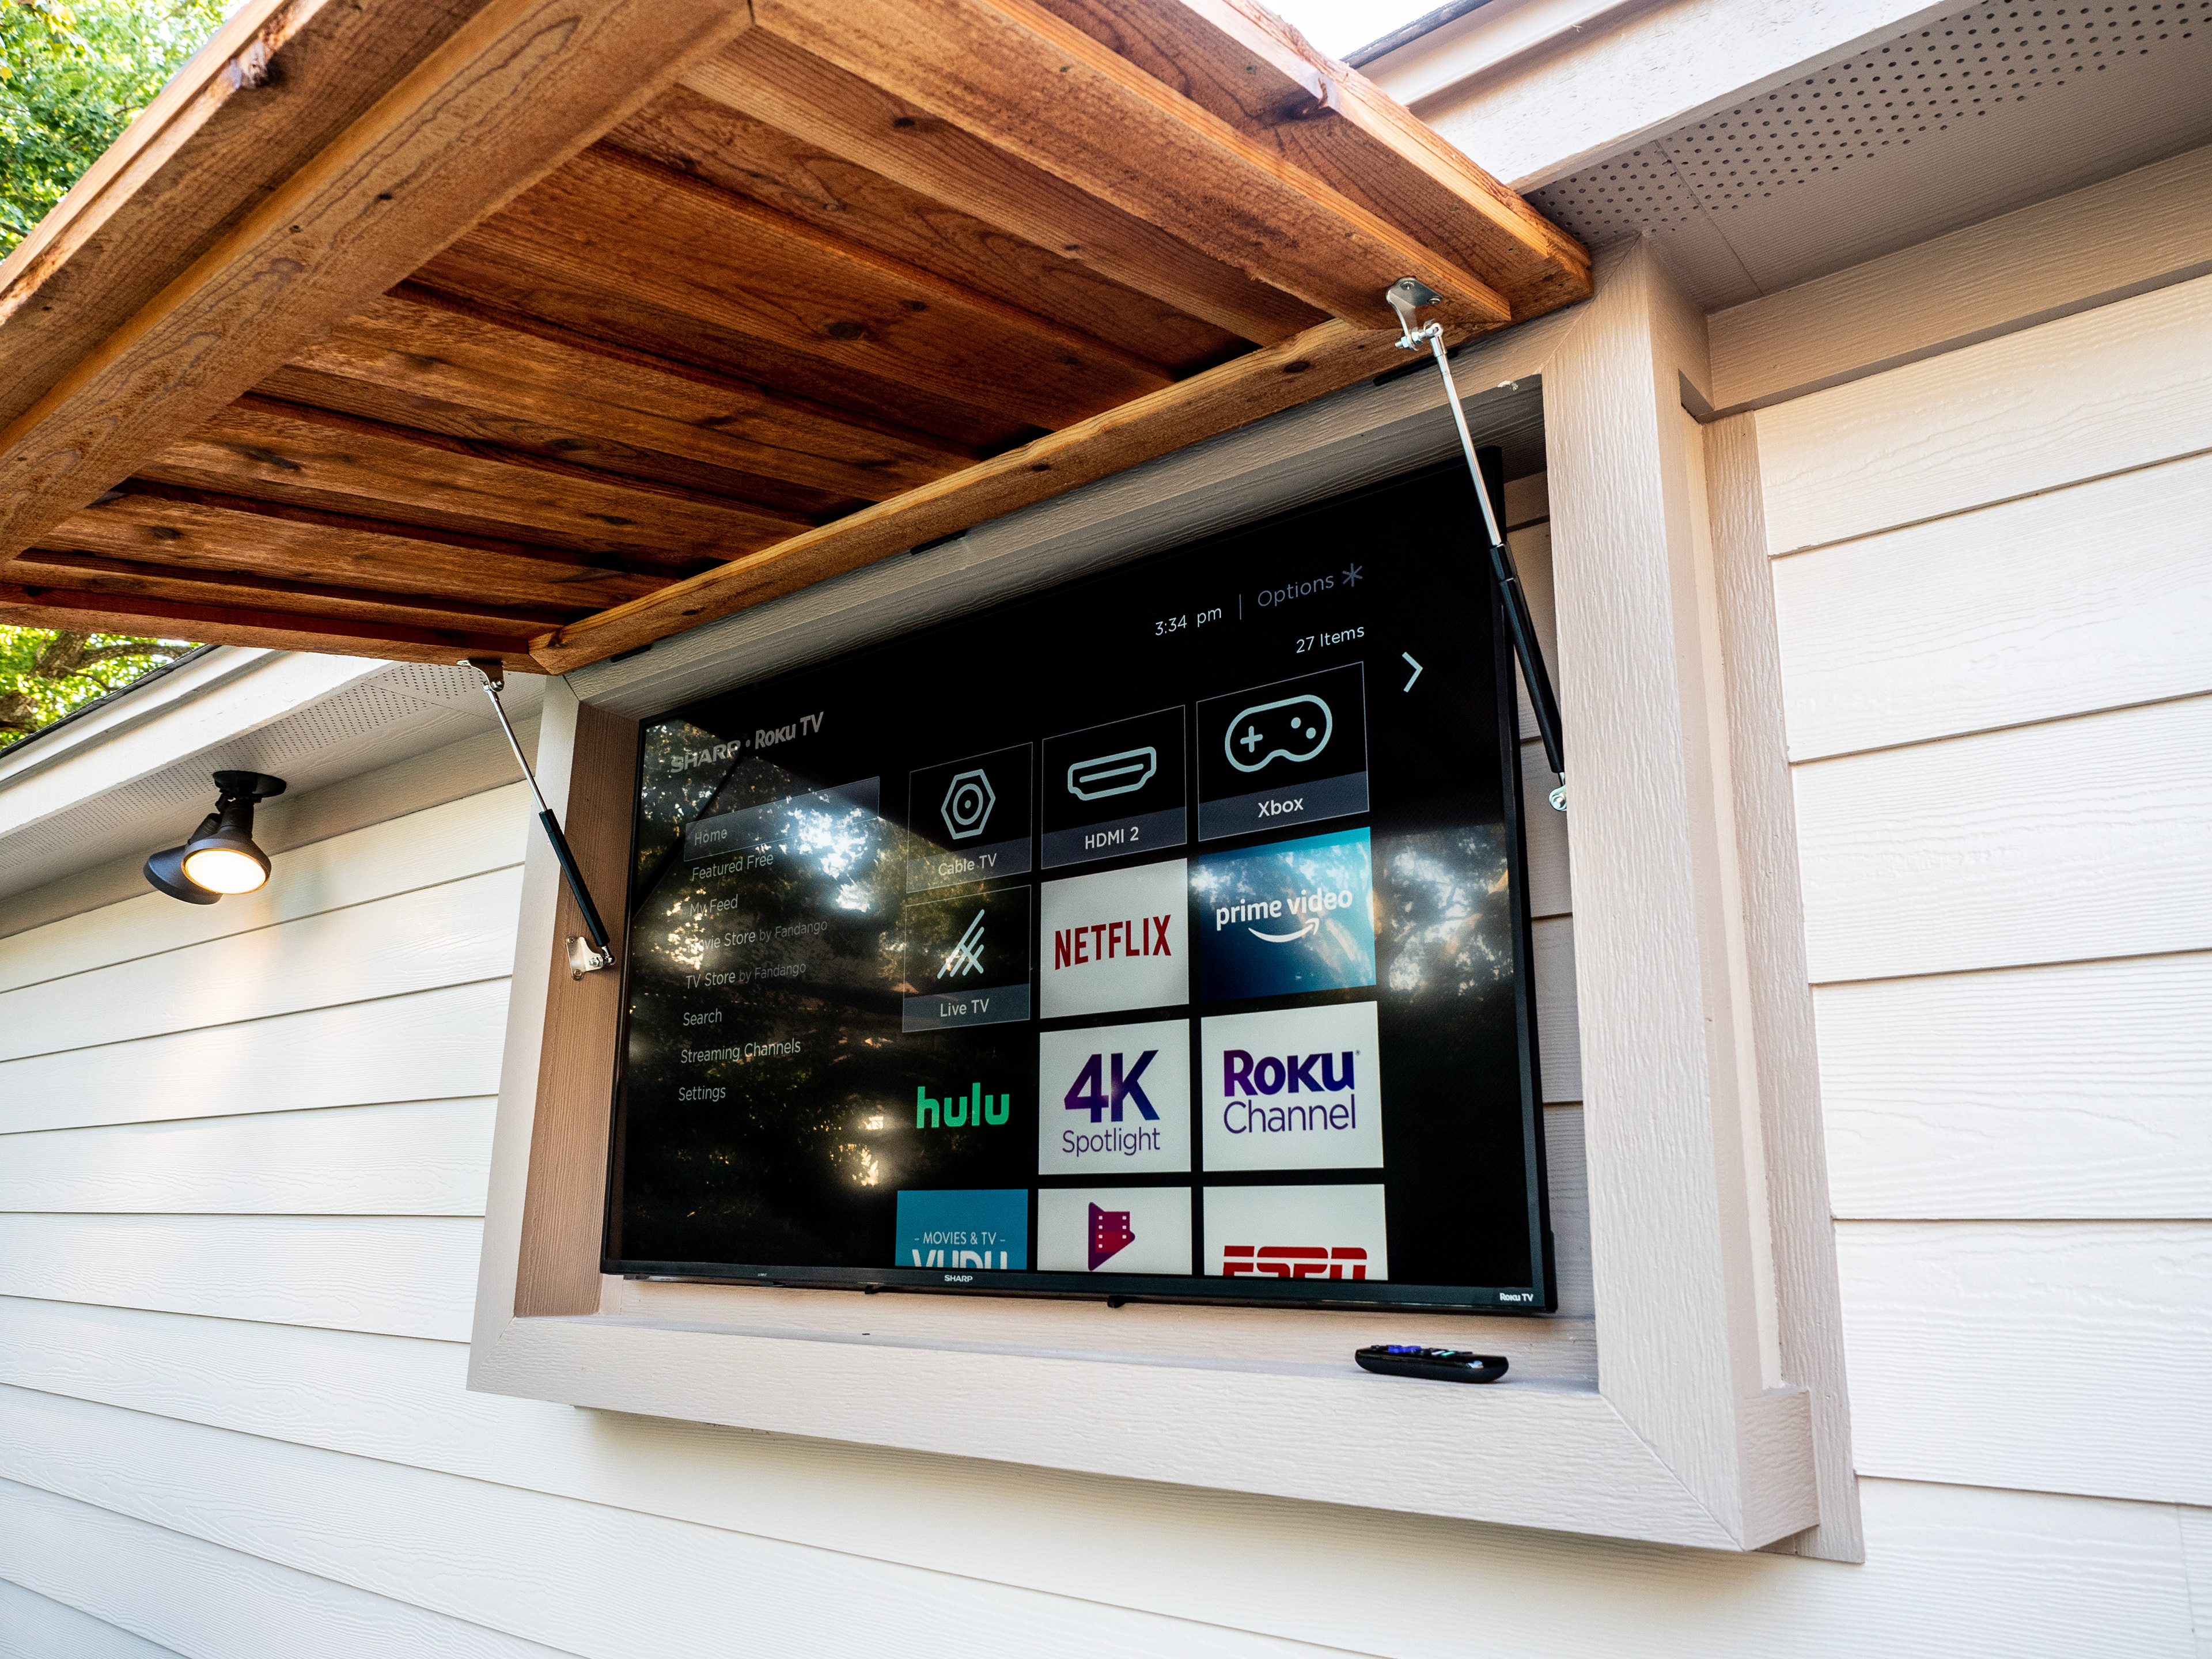
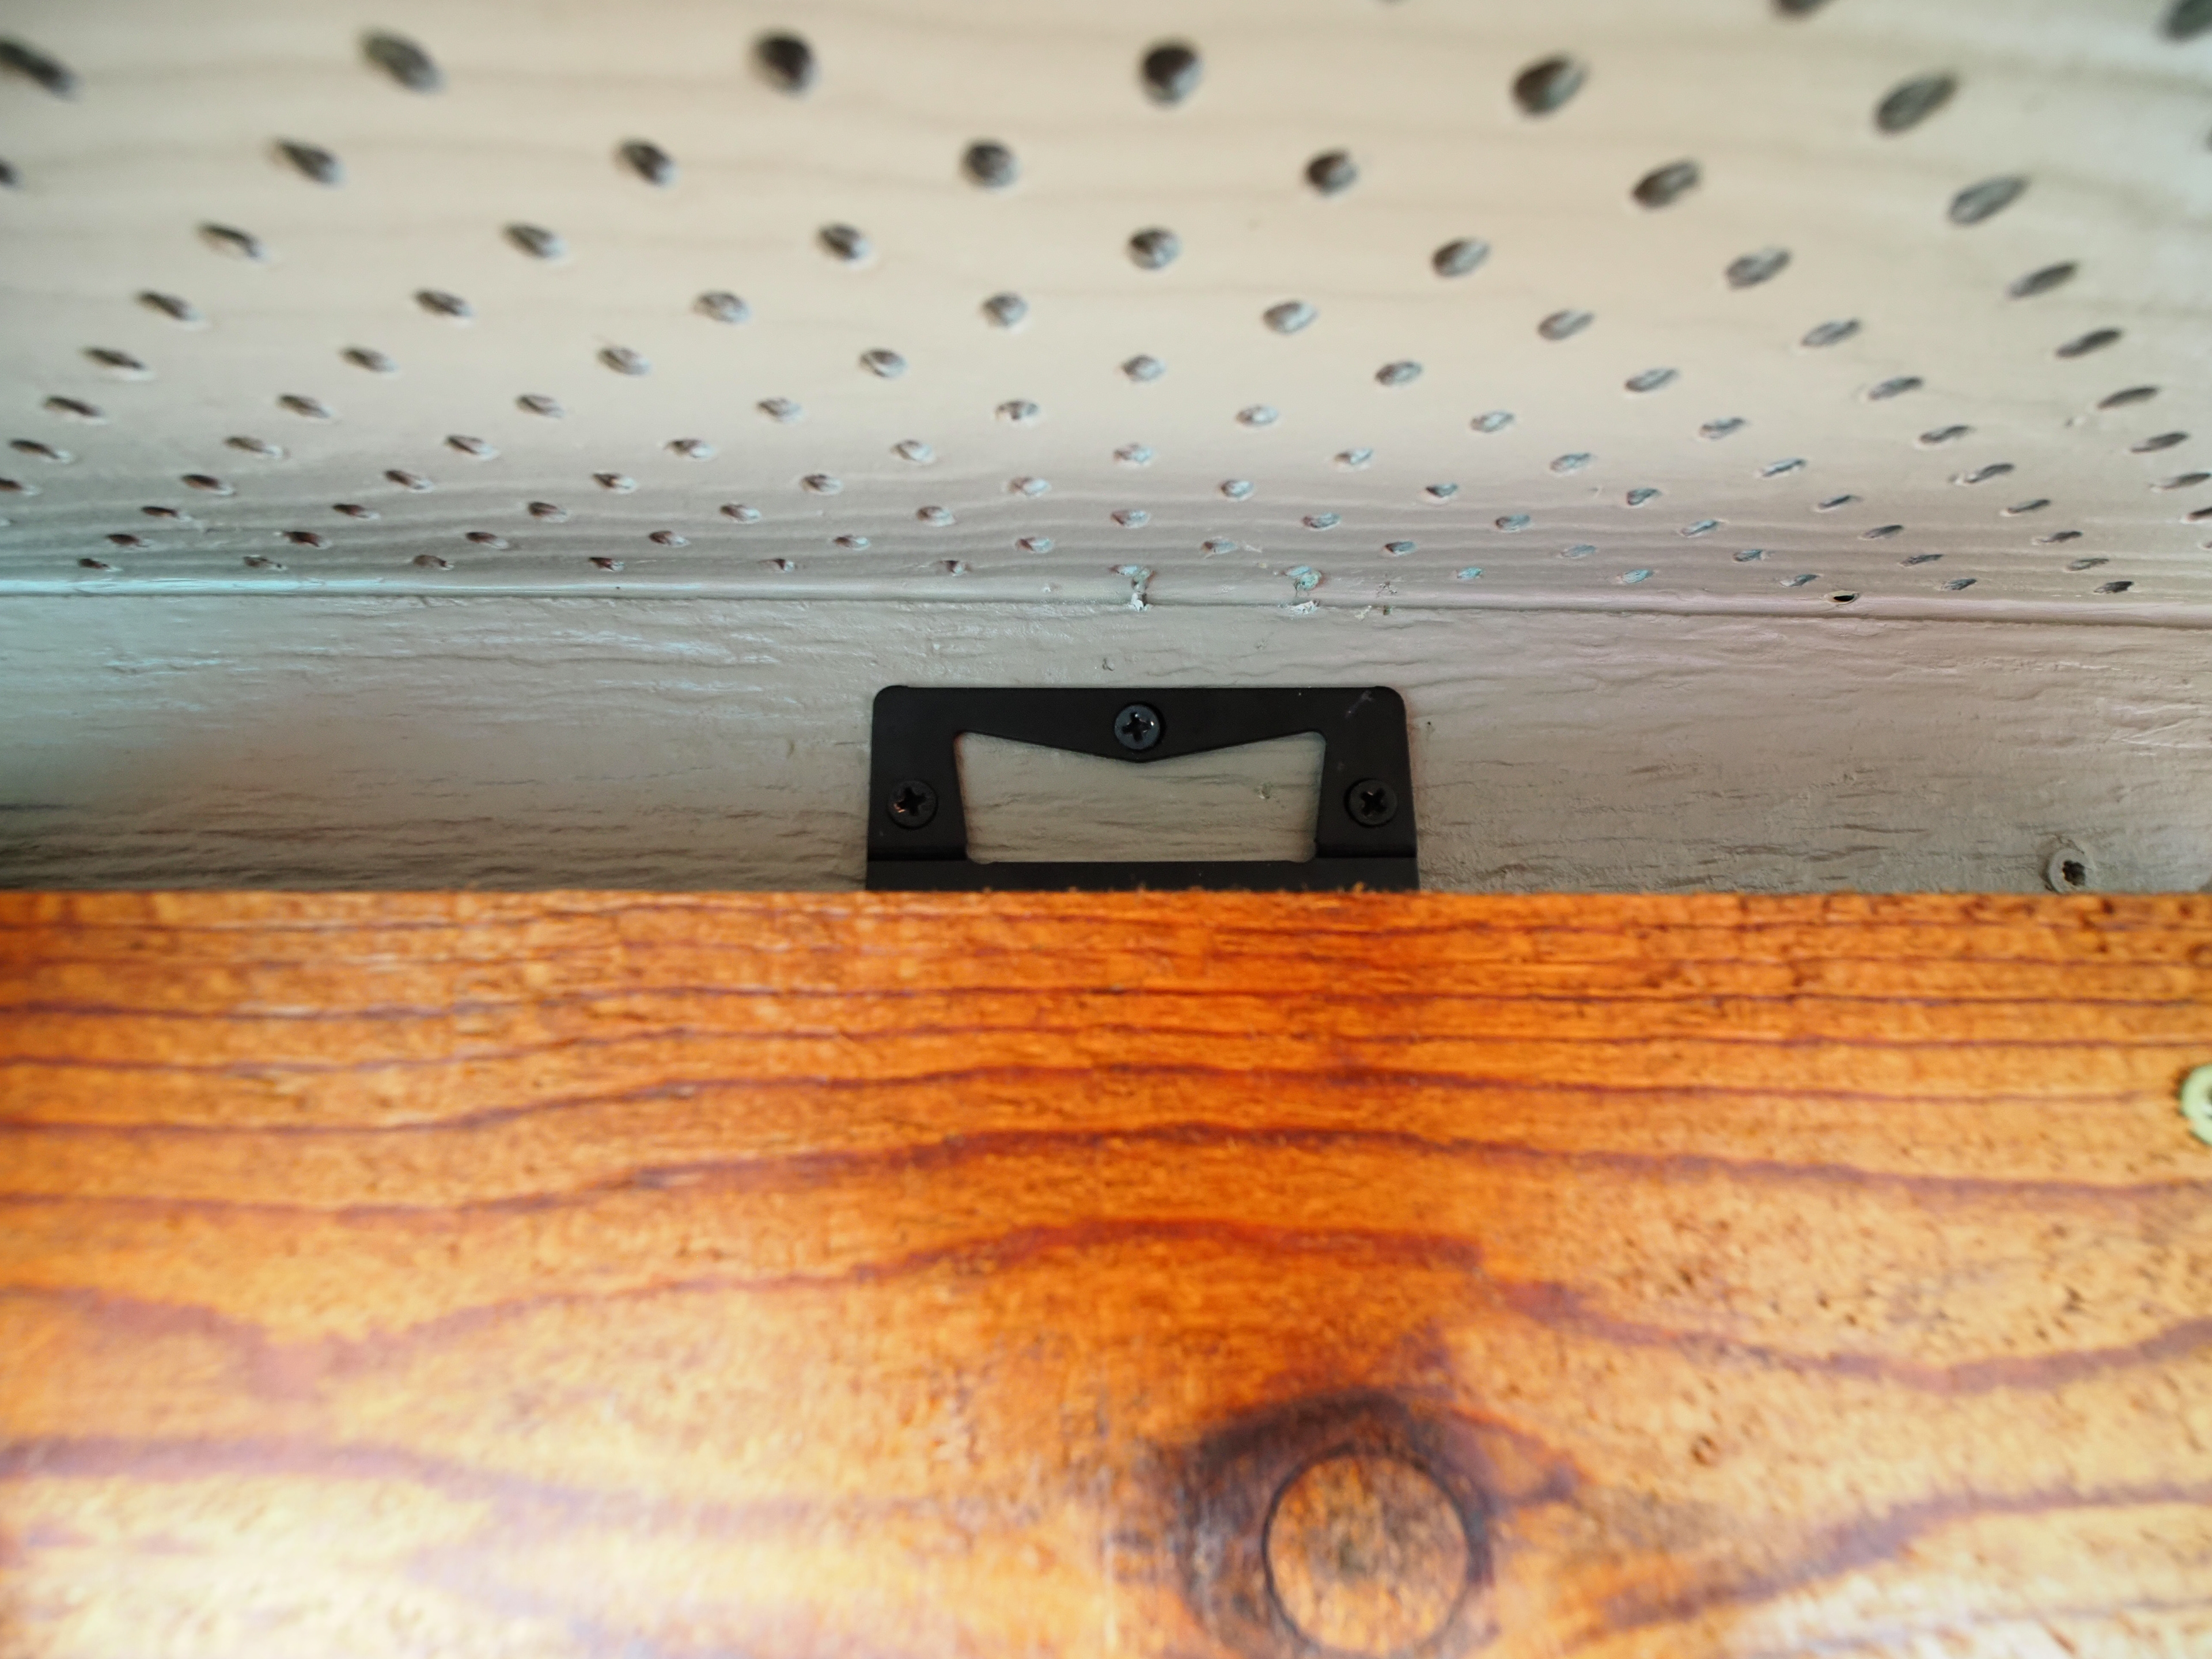
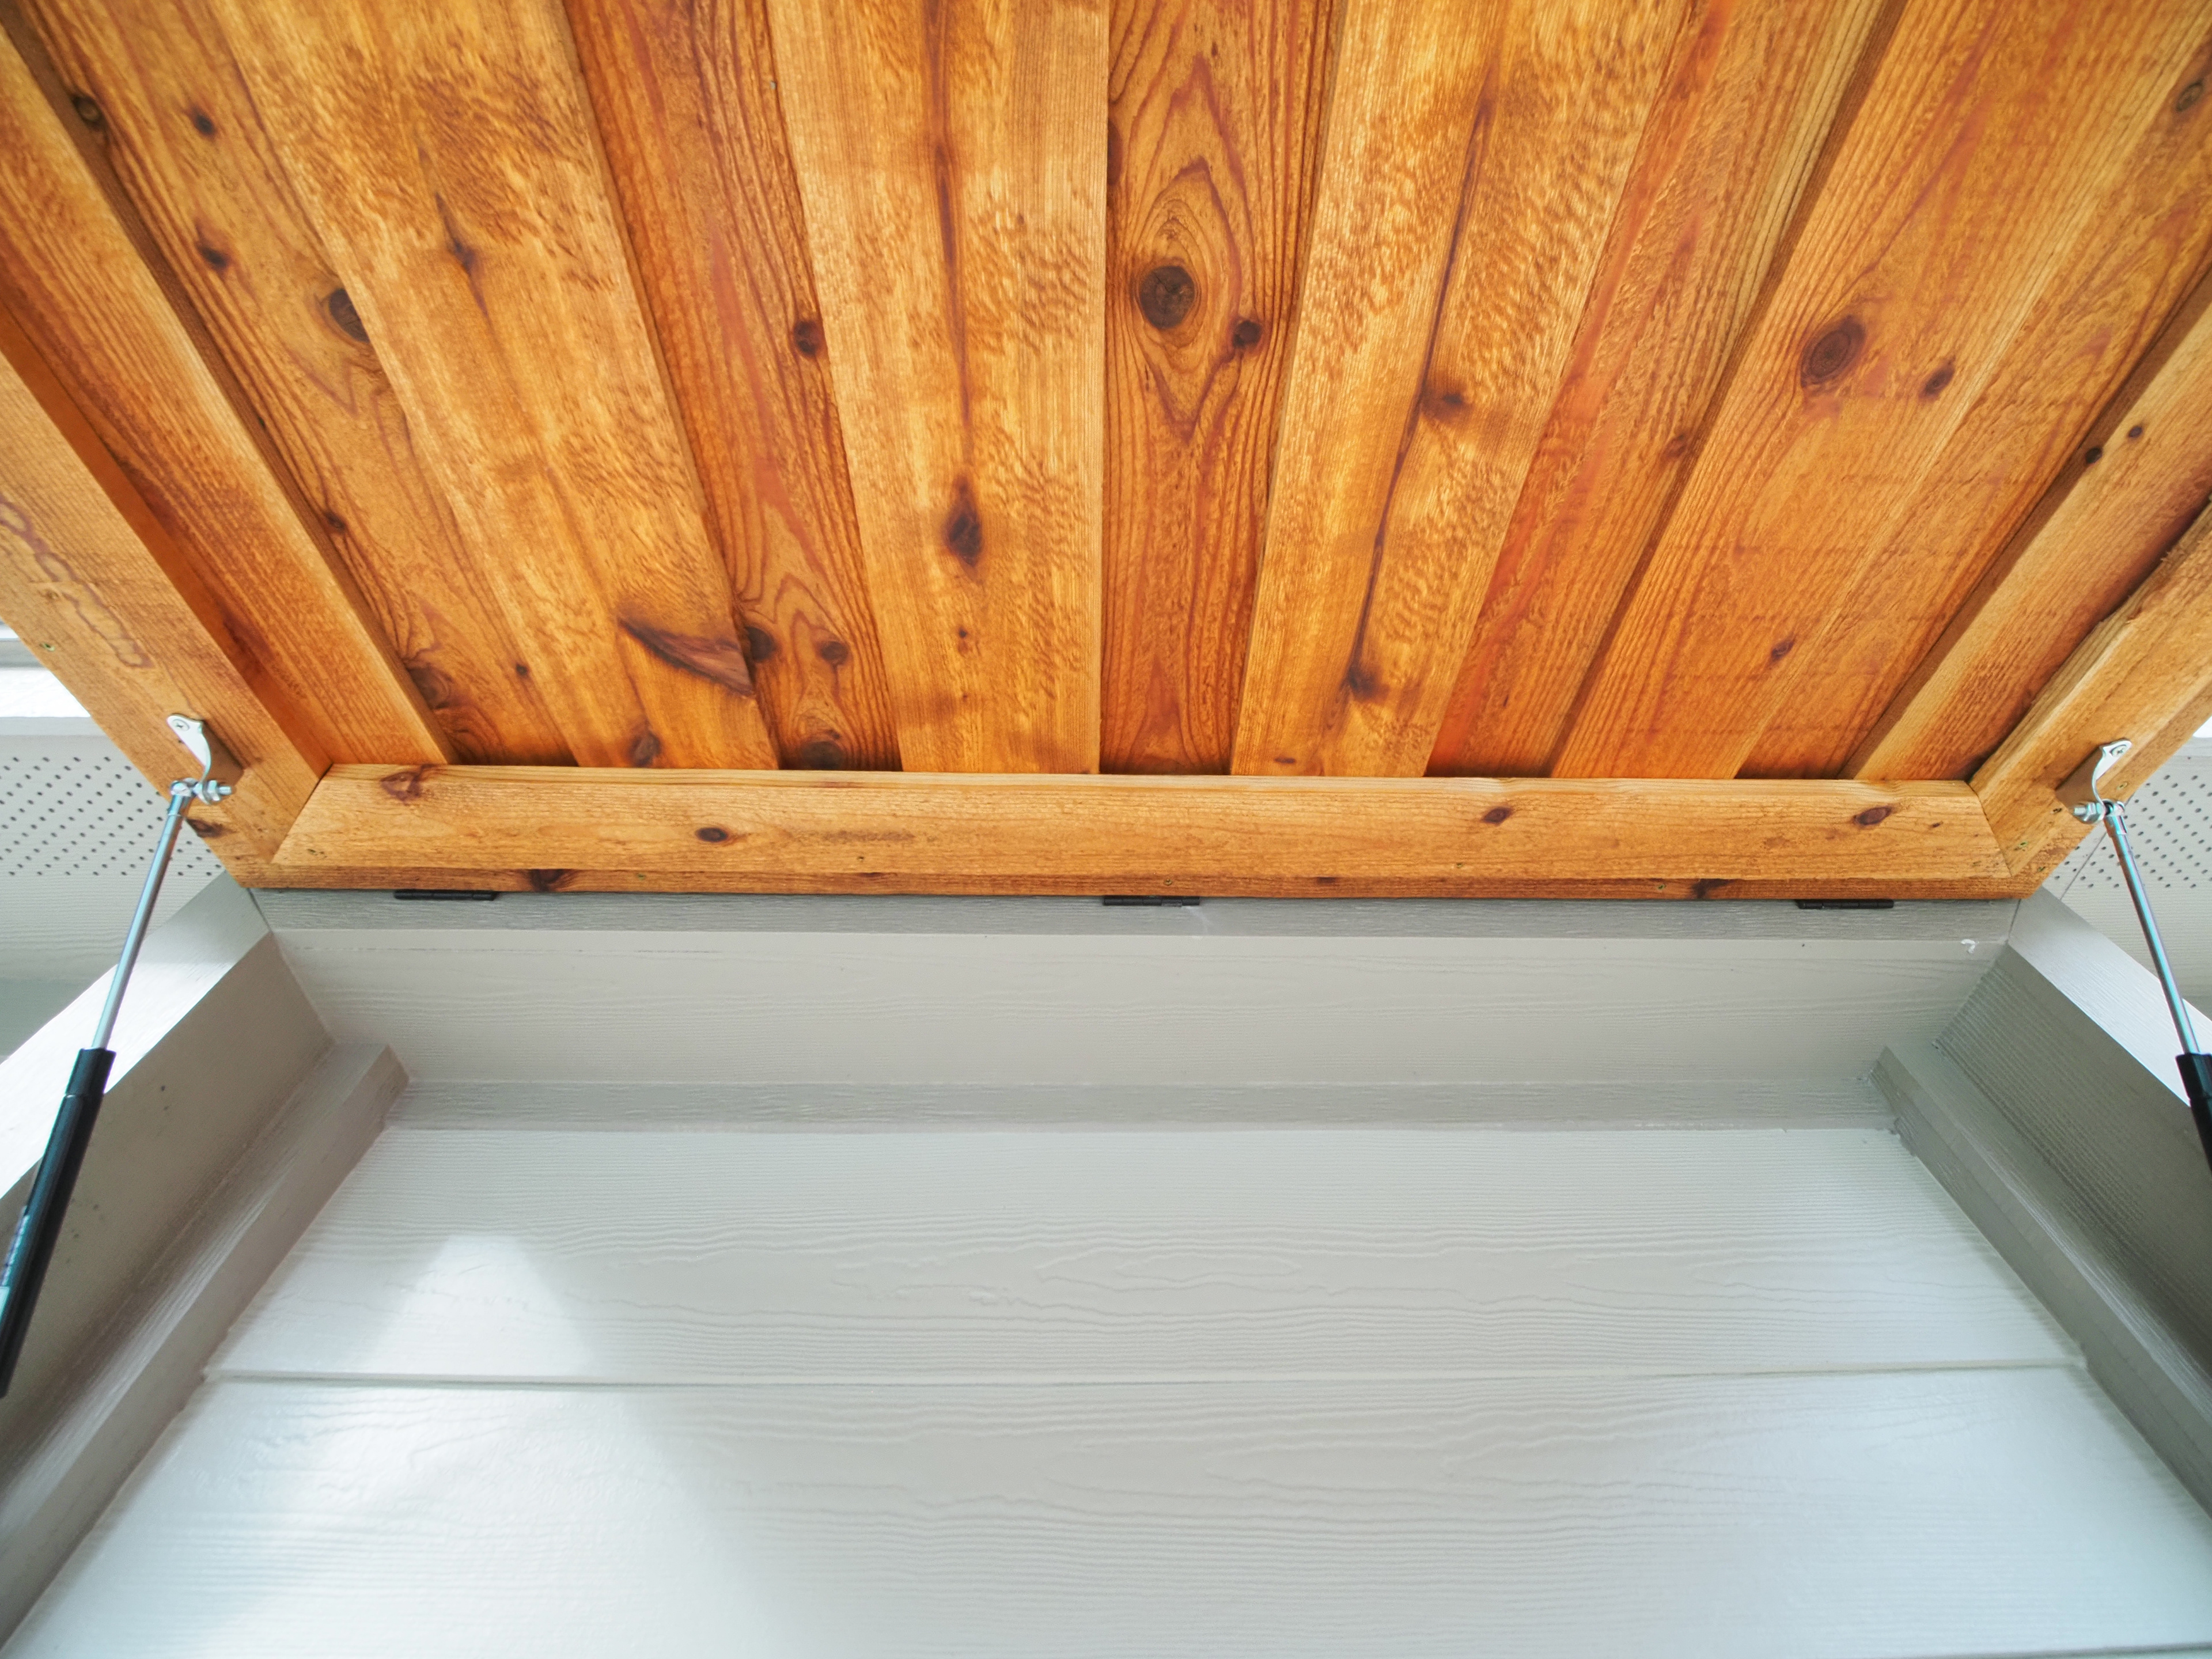
Step 6 - Install Door/Cover and Gas Struts
Hang door/cover and fasten hinges to trim, install 2x 15" 67lb struts.
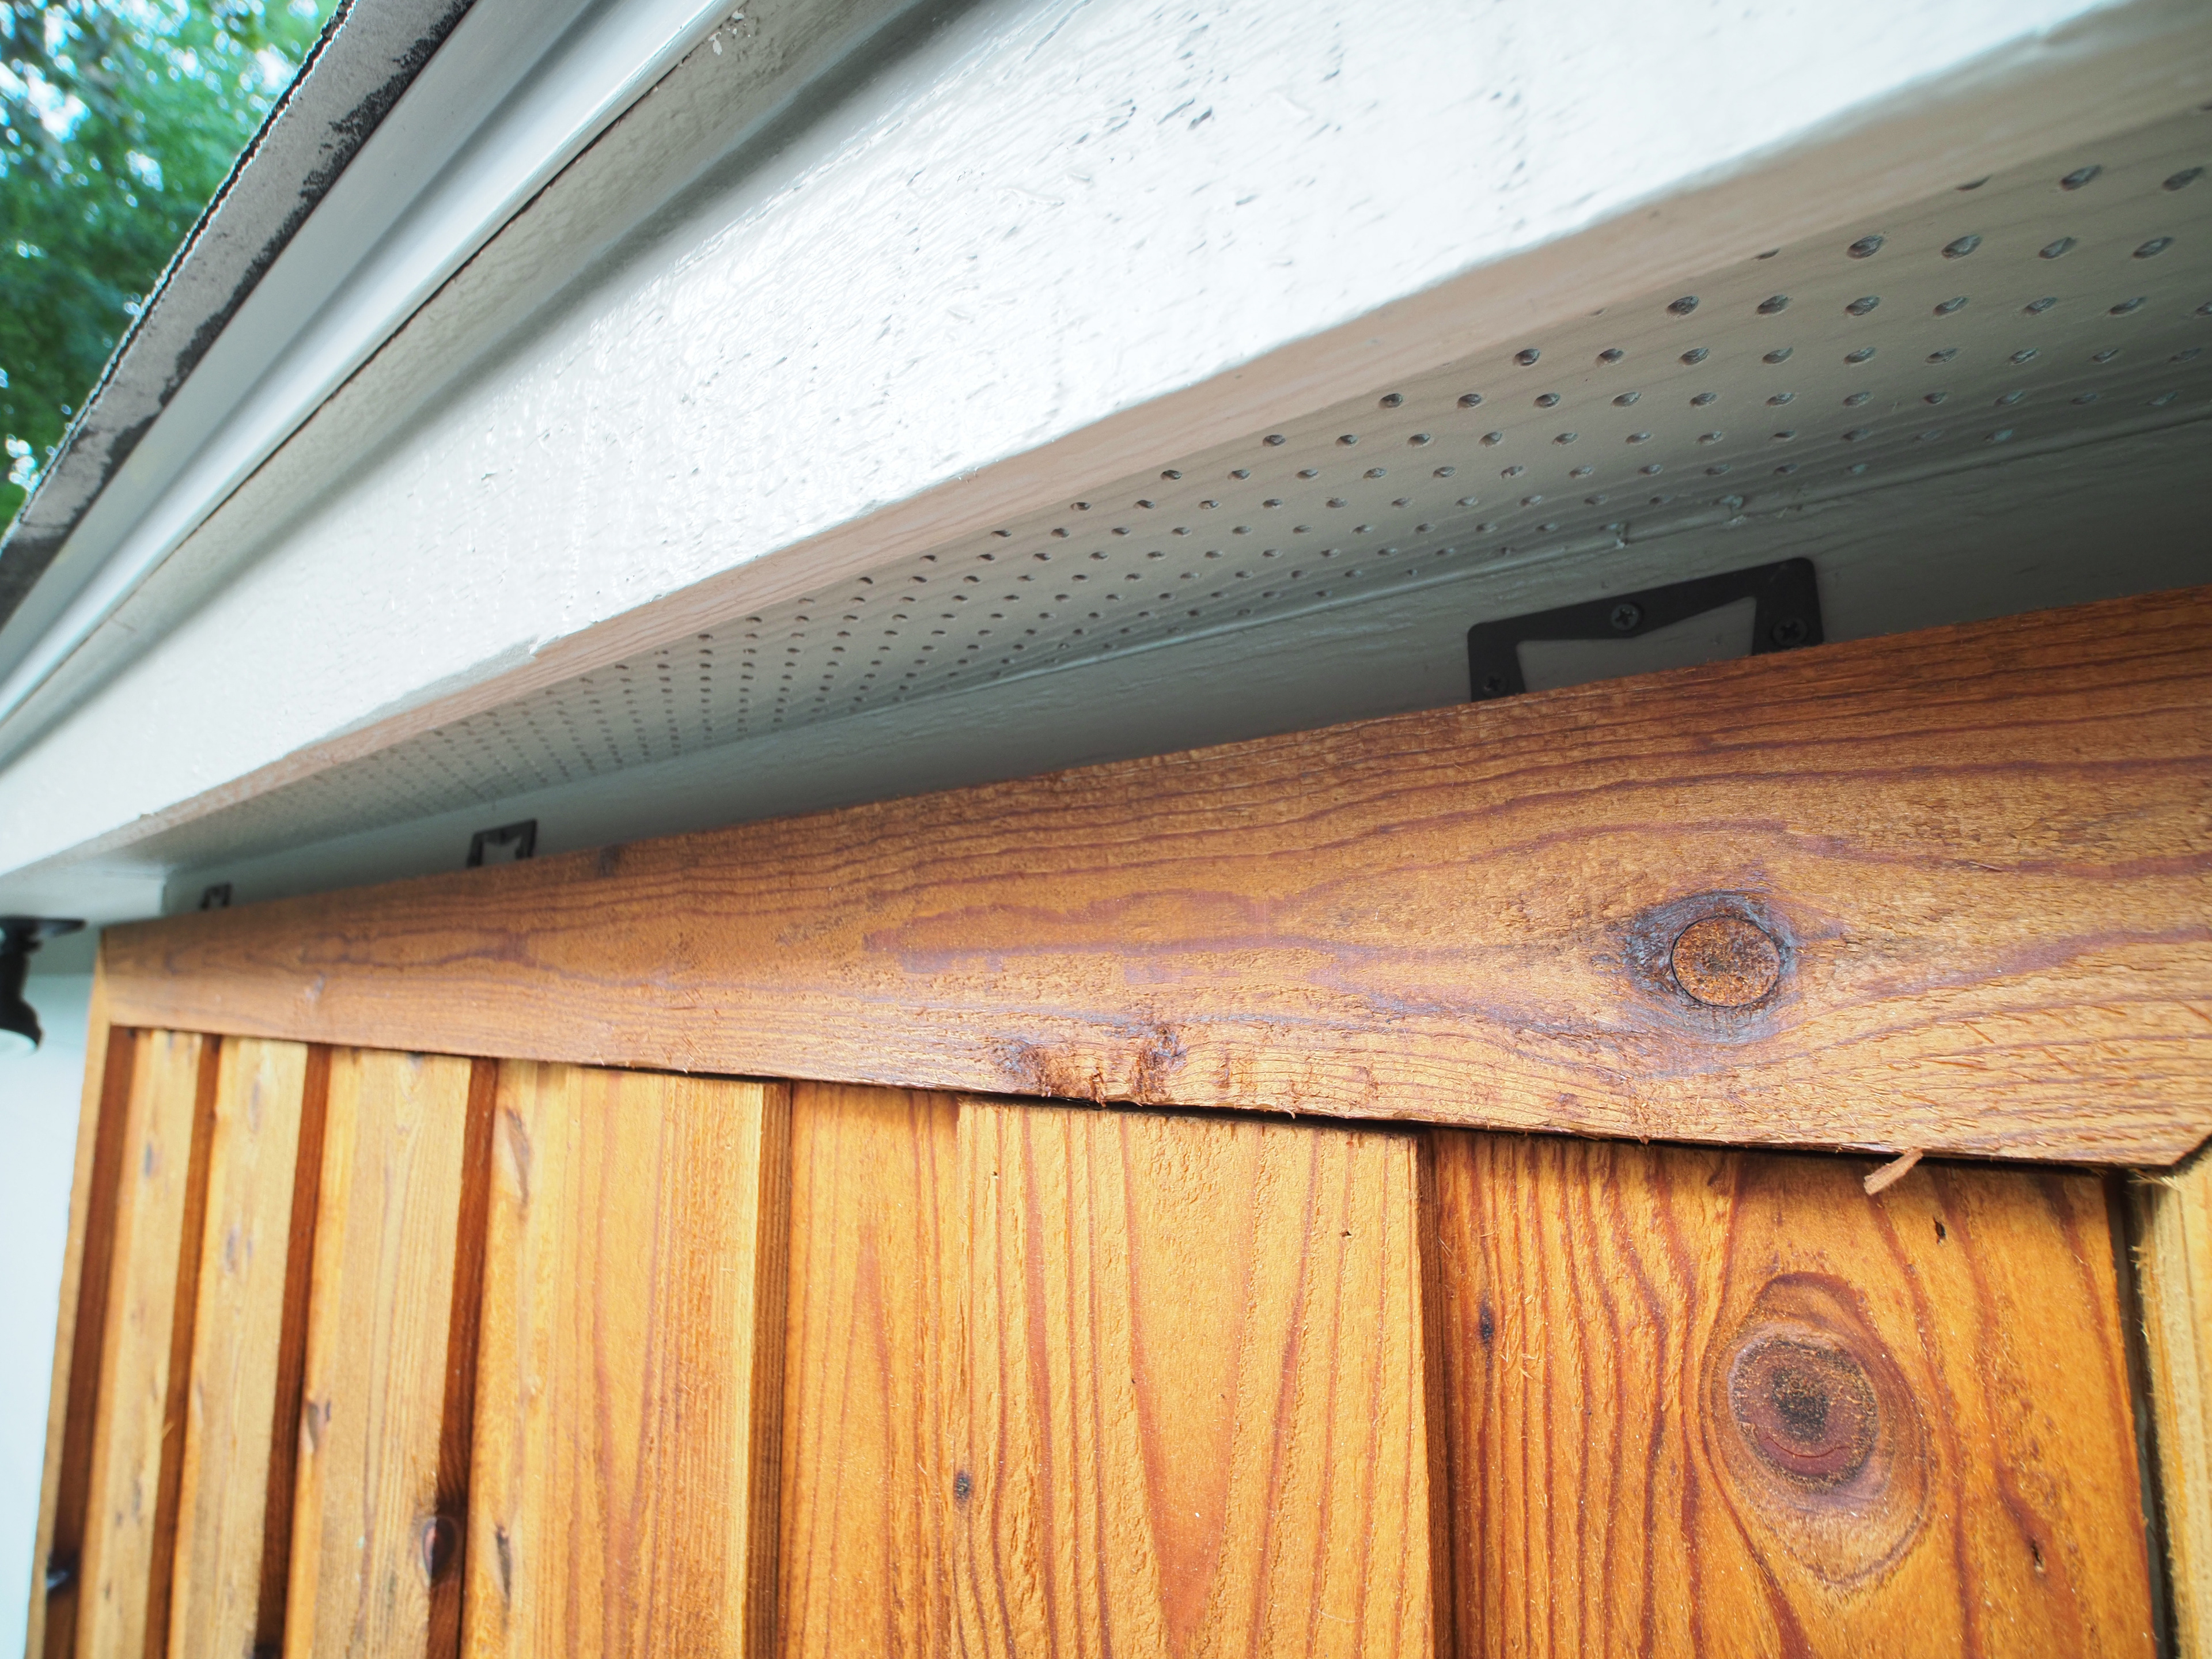
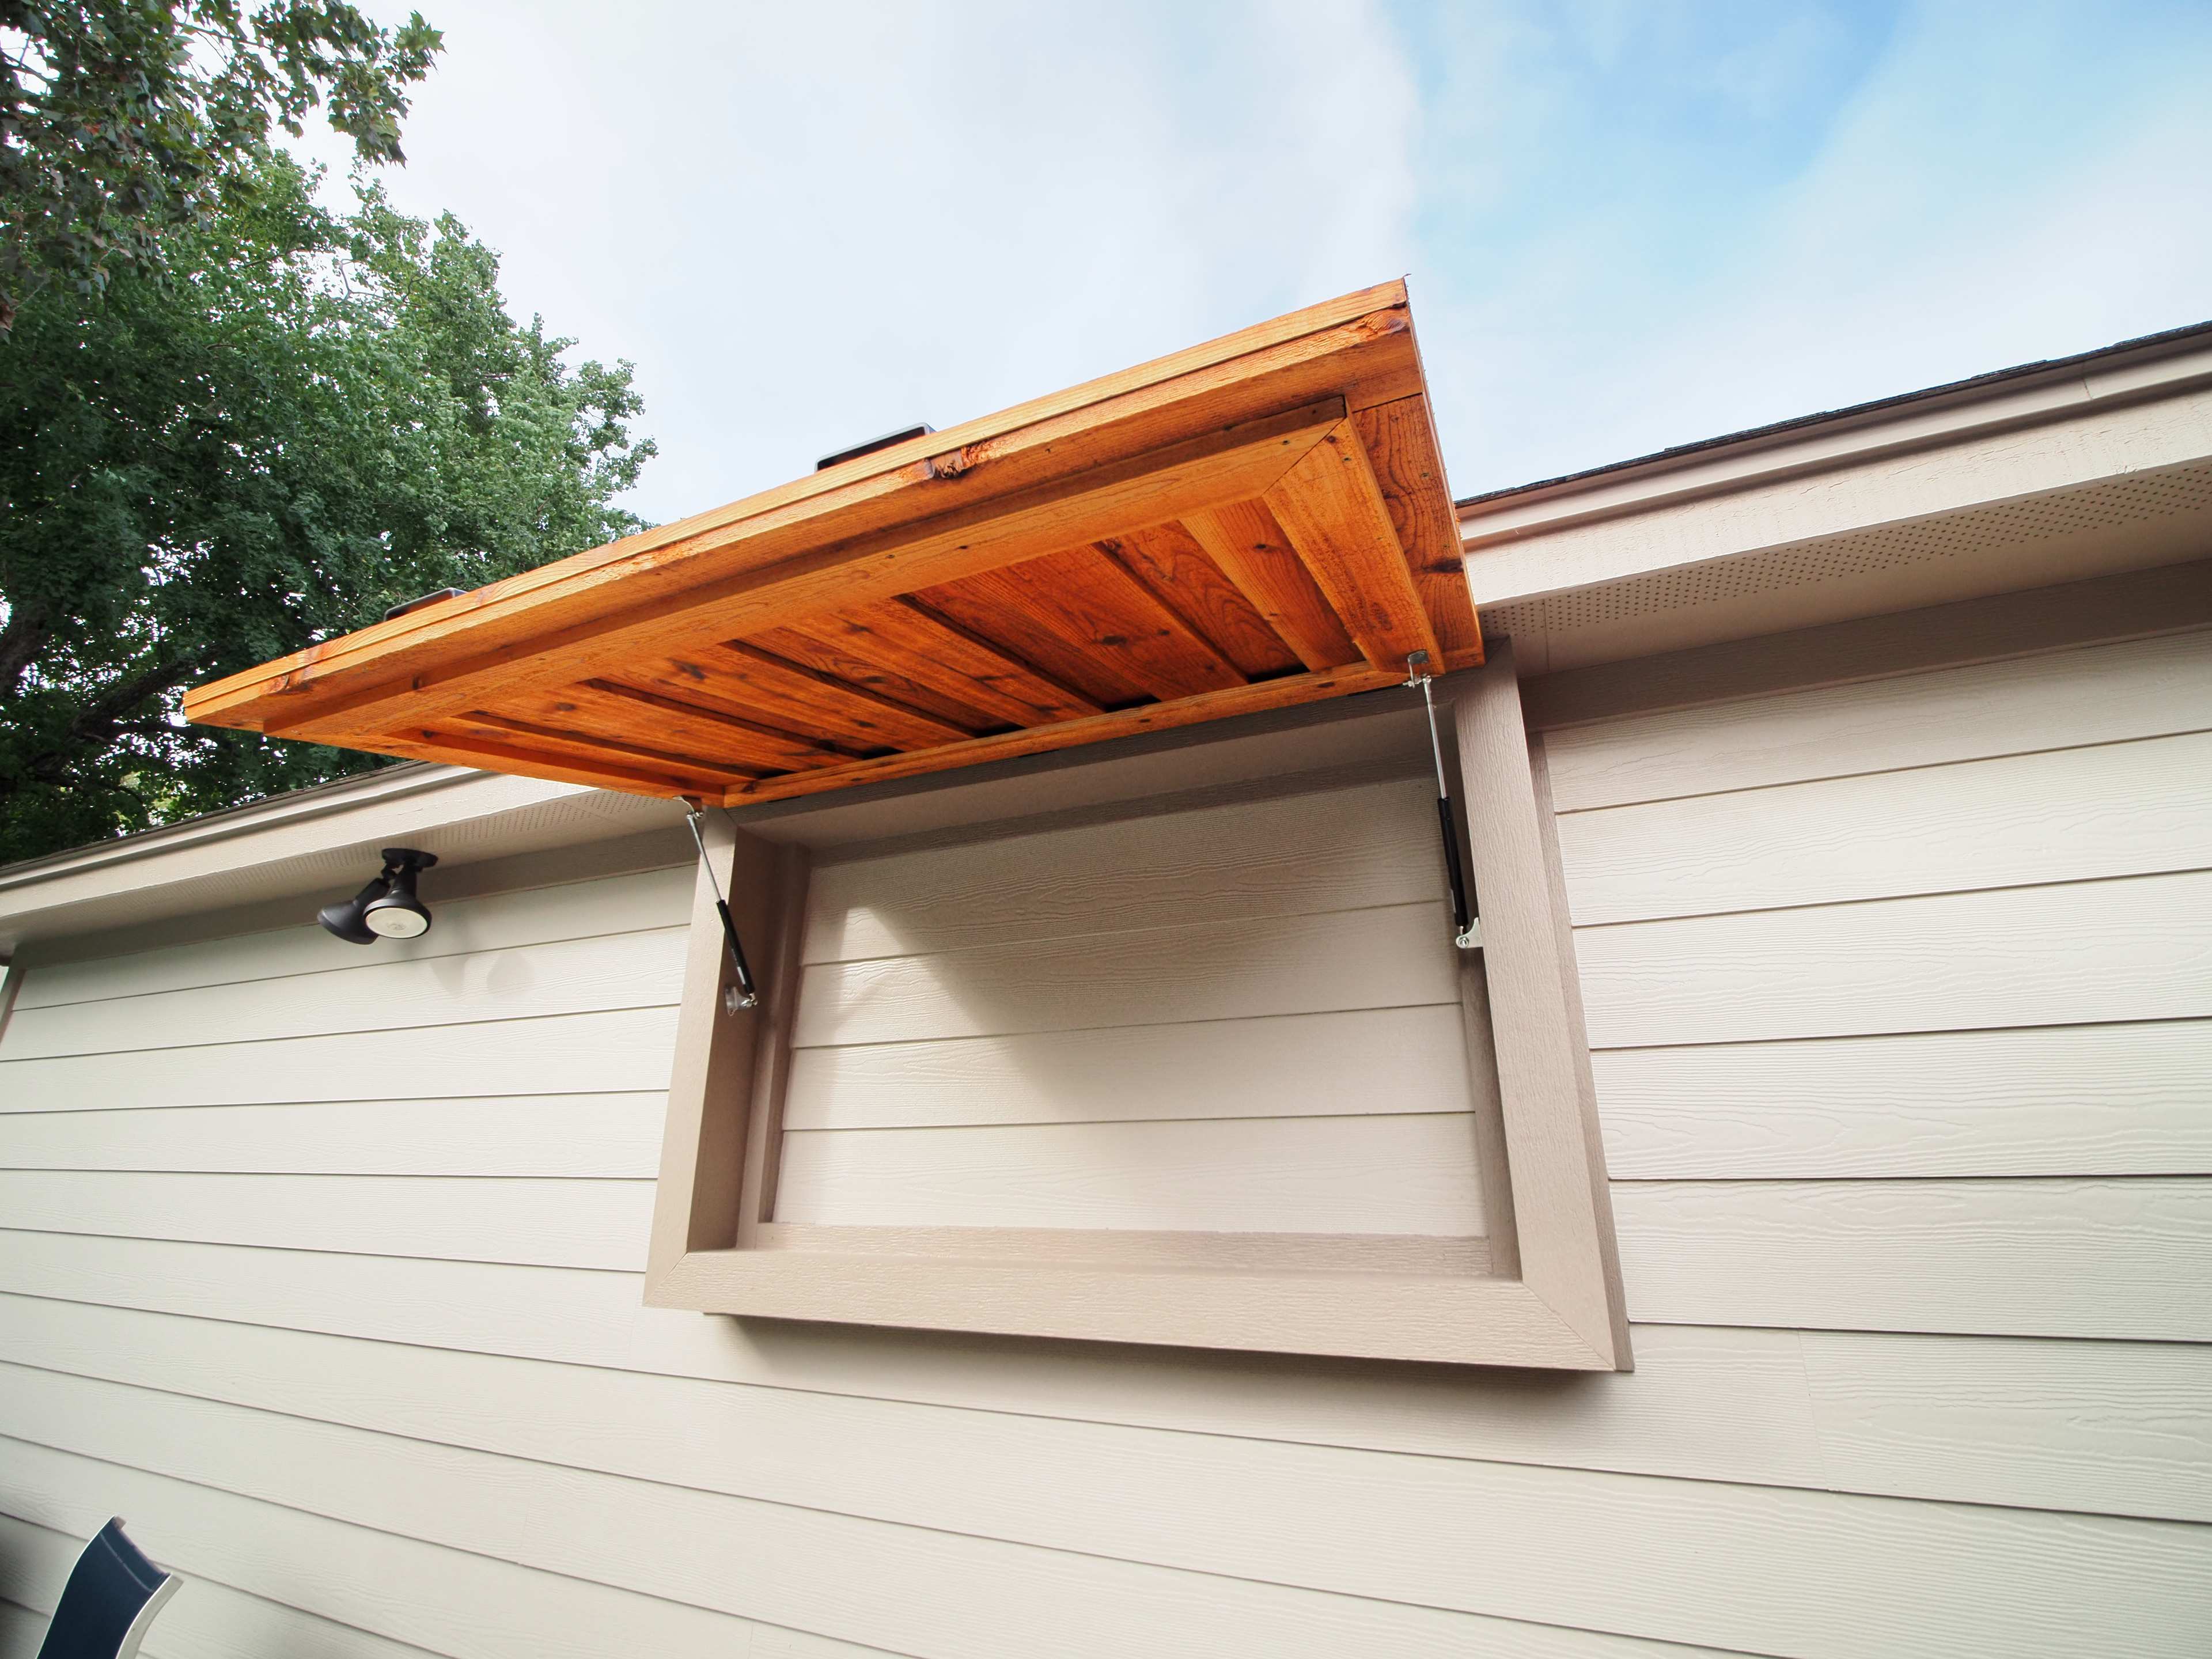
Step 7 - Install TV mount and TV
Install TV mount, ensuring proper height based on your tv and mount dimensions. Most 55" TVs should fit, but will be a tight fit, so verify dimensions before purchasing and installing. Cut/drill any holes through the siding that will be needed for power cables/HDMI/Ethernet.